How to Plan Inventory & Create a Production Schedule
I’ve created a bonus set of worksheets, which you can download for FREE HERE. to accompany THE SUCCESS PLANNER. If you would like all of the worksheets to plan all aspects of your business for the entire year, you can download THE SUCCESS PLANNER here.
If you’ve downloaded THE SUCCESS PLANNER you’ll already have some of the numbers required for these worksheets, as well as additional worksheets mentioned in this article.
(*Tips for calculating how much stock to bring to a craft show here)
One of the MOST IMPORTANT lessons I share with handmade business owners is to:
CREATE STOCK WITH PURPOSE
Meaning:
- Don’t create anything and everything you can; create a specific product for a specific market
- Don’t create products based on materials that catch your eye; build collections that serve a purpose
- Don’t create as much stock as you can for the month or for a craft show; assess your sales goal and create the right amount of stock that helps you reach that goal
These worksheets will help you plan stock and create the right amount of stock each month.
>> Too much stock means wasted time and materials (especially if those products are seasonal).
>> Too little stock means lost sales.
A small handmade business requires a lot of work, and creating is just one portion of that work.
You can’t spend all working hours creating products; you must focus equal amounts of time on tasks that market those products and get them sold.
These worksheets will help free up some of that time and make room for the other important tasks covered in THE SUCCESS PLANNER.
Here’s how to use the worksheets.
*PLEASE PRINT THE WORKSHEETS FIRST SO YOU CAN REFERENCE THEM OR FILL THEM IN AS YOU READ THIS ARTICLE (it may be hard to follow along without the worksheets in front of you)
PRODUCT PLANNING WORKSHEET
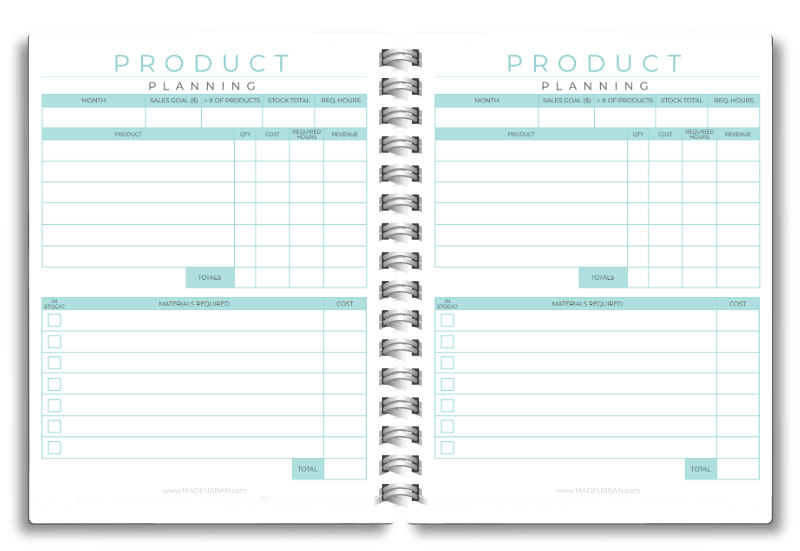
This worksheet (which you can download for FREE HERE) will help you take a look at your sales goal for an upcoming month and plan products based on that goal, as well as the supplies you may need to order.
Below are the fields on this worksheet and how to fill them in:
PRODUCT PLANNING SECTION
MONTH – fill in the upcoming month.
SALES GOAL – through your work in THE SUCCESS PLANNER, look at your QUARTERS worksheet, or last month’s REVIEW worksheet to determine how much money you must make this month to stay on track to hit your yearly sales goal. If you were under or over your sales goal last month, adjust this month’s accordingly.
This sales goal is your revenue goal. That’s the total that comes in from sales. It does not reflect your profits. These numbers are calculated separately in THE SUCCESS PLANNER (and it’s important to know the difference).
= NUMBER OF PRODUCTS – take the average price of your products and divide your sales goal by that number to calculate approximately how many products you’ll need to make to hit your sales goal.
For example, if I have 3 products and sell fairly equal amounts of each, I would get the following average for price point:
Product 1 – $5.99
Product 2 – $9.99
Product 3 – $24.99
Average price point = $13.66
If my sales goal for the month is $1000, I would need to sell approximately 74 products. (1000 divided by 13.66)
*If you sell more of certain products than others you can calculate a weighted average price point based on the percent of sales each product accounts for in your total revenue (e.g. 60% of sales come from product #1, 30% from product #2, 10% of sales come from product #3). Weighted average not shown in this example.
STOCK TOTAL – keep in mind, it’s not typical to sell the exact number of products you make. You don’t want your craft show table or online shop to become more and more depleted the closer you get to reaching your sales goal.
You want your shop to look full and have a well-rounded selection for people to shop. Determine how many more products you’d like to have, above your product total, to keep your shop looking full.
Also, take into account, how much stock you have leftover from last month that will contribute to this month’s sales goal.
REQ. HOURS – the approximate number of hours it will take to create the amount of stock you need for the month.
Find the average (or weighted average) of how many products you can create in an hour and then divide your stock total by that number.
For example, let’s say I wanted to create 100 items this month to reach my sales goal and have stock leftover so my shop isn’t empty at the end of the month. If, on average, I can create 2 products per hour, I would require approximately 50 hours in the upcoming month to create 100 items.
If I could only make one product in an hour, I would require 100 hours to make enough products to reach my sales goal.
If the number of hours you require to reach your stock total is unrealistic, you must re-assess your sales goal, your product prices, or determine a way to reduce your production time.
You may also consider the points in this article to make less but sell more at your next craft show.
PRODUCT – in this section you can get more detailed about the specific products you’ll create this month. Remember to choose products based on:
- Collections (how will products work together to tell a story in your shop or craft show booth?) *HOW TO CREATE A HOLIDAY COLLECTION
- Your customers’ shopping habits
- Your profit margins
QTY – the quantity you’ll create for each specific product
APPROX. COST – approximately how much will materials cost to create that much inventory in that product?
HOURS – the hours required to create stock levels in each product. This not only gives you a more realistic look at the number of hours required for production in a month, but also, when you multiply that number by your hourly wage, it gives you a rough idea of how much money you must make in a month to cover your wage (*for production hours only. This does not include how much you must be paid for hours worked on marketing, selling, and admin tasks).
REVENUE – multiple the retail price of a product by the quantity you plan to make. This will give you the potential revenue you can earn if you sell all those items.
TOTALS – total the numbers in each column: QTY, COSTS, HOURS, and REVENUE.
WHY YOU NOTE COSTS & HOURS: Take your HOURS total and multiply it by how much you’d like to be paid per hour. Now add that number with your APPROX. COSTS total and compare that total with your potential REVENUE total. If your REVENUE total is not the higher total, you’re not profiting and must reduce your costs, reduce your hours, and/or increase your prices.
MATERIAL PLANNING SECTION
Planning your materials at the beginning of the month allows you to save on costs.
>>You may be able to get a discount when buying in bulk, as opposed to buying materials throughout the month as you need them.
>>You also save time by batching your supply shopping tasks together instead of paying to ship items individually several times a month or making several trips to the supply store.
MATERIALS REQUIRED – based on your PRODUCTS list, write down the materials you’ll require to make each product in the quantity you decided upon.
IN STOCK? – check this box if you have required materials in stock or as you order them.
COST (IF PURCHASING) – as you order materials, track the exact costs so you have more accurate numbers to work from moving forward. Every single material must be tracked, no matter how small; it all adds up at the end of the year and takes away from your bottom line. Be sure your prices and sales cover ALL costs and wages.
TOTAL – tally the money you spend on materials this month.
*There are 6 spaces to list products you plan to make for the month because I advise against offering too many types of products. Not only can too much selection decrease sales but it also makes you less productive.
With each new product you introduce it means more:
- Materials
- Patterns / techniques / tools
- Photos
- Marketing
- Listings
- Product descriptions
- Etc.
Simplifying the products you offer allows you to streamline your business and reduce costs.
PRODUCTION WORKSHEET
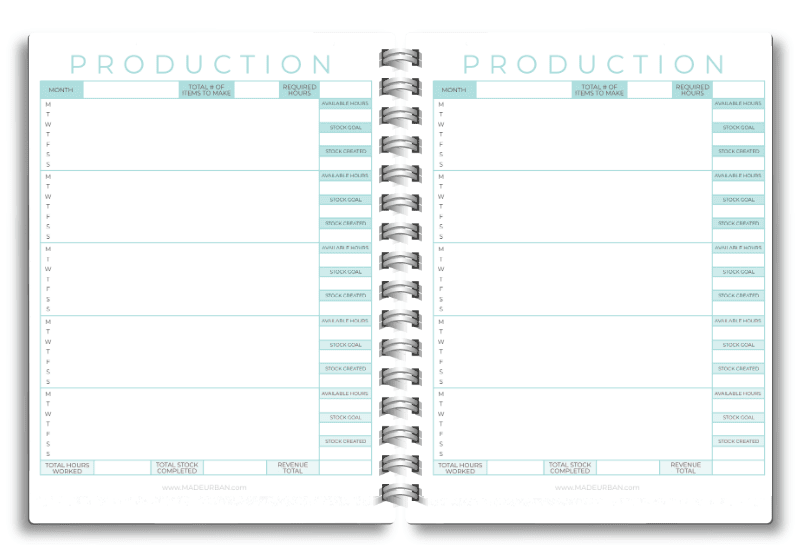
This worksheet (which you can download for FREE HERE) can be used to plan which products you’ll create and when, and make sure you’re staying on track throughout the month.
Tasks from this worksheet can be slotted onto the WEEKLY worksheets in THE SUCCESS PLANNER.
Below are the fields on this worksheet and how to fill them in:
MONTH – fill in the upcoming month.
TOTAL # OF ITEMS TO MAKE – enter your STOCK TOTAL number from your PRODUCT PLANNING worksheet, we’ll break this number down by week to create a schedule.
REQUIRED HOURS – enter your REQ. HOURS number from your PRODUCT PLANNING worksheet, we’ll break this number down by week to create a schedule.
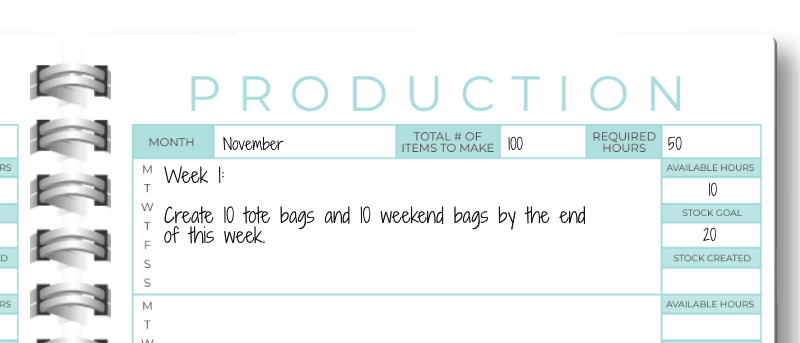
SECTION FOR EACH WEEK OF THE MONTH – if you have THE SUCCESS PLANNER, you can get specific with which production tasks will be completed on which days when you fill in your WEEKLY calendar worksheets. Use each space on this worksheet to create an overview of the month and what you would like to complete each week. You may also include any notes that are important to your production schedule (e.g. “out of town this weekend, must complete work during the week”). For example:
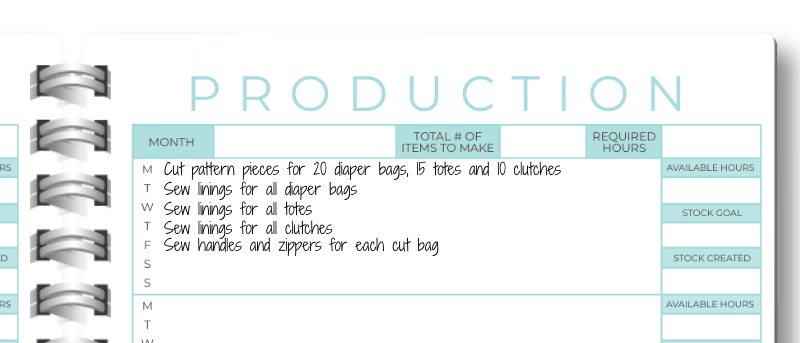
If you’re using this worksheet as your weekly calendar, you can use the M, T, W, T, F, S, S lines to get detailed with which day production tasks will be completed. For example:
AVAILABLE HOURS – write down how many hours you have to work on production each week of the month. Make sure when you add up AVAILABLE HOURS for each week, it lines up with your REQUIRED HOURS.
STOCK GOAL – take your TOTAL # OF ITEMS TO MAKE number and divide it by the number of weeks you’ll be working on production. Enter that total under the STOCK TOAL section for each week.
Again, adjust these numbers based on the hours you have available each week, or on your production schedule.
For example, if you batch all prep of materials one week, assembly of one part of a product the next, and the second part of assembly the following week, you may not actually plan to “complete” any stock until the fourth week of the month.
STOCK CREATED – at the end of each week, enter the total number of products made. If you’re over or under your STOCK GOAL for the week, adjust the goals for the following weeks.
TOTAL HOURS WORKED – keep track of the number of hours you worked on production so you have more accurate numbers moving forward. You may think it takes an hour to create a product but you may be forgetting about the finishing details such as tagging, packaging, etc., which add up in a month. As you track, you can plan more effectively moving forward.
TOTAL STOCK COMPLETED – the total number of items you created for the month. Again, good to keep track of these numbers so you can reference them as you’re planning upcoming months.
Next year, when you’re prepping for the same craft show, you can look back and see how many products you created and how long it took you to create them, and then plan your schedule accordingly.
You can also reference your tracking worksheets from THE SUCCESS PLANNER, where you tracked sales and notes from the craft show and determine if you should plan to create more stock, less stock, or a different selection of stock.
REVENUE TOTAL – add the retail prices of each product made so you know how much you can potentially to earn this month if all products are sold.
CUSTOM ORDERS WORKSHEET

This worksheet (which you can download for FREE HERE) can be used to tack any custom orders your business receives and that must be added to your planned stock for the month.
Products for these orders can be slotted into your PRODUCTION schedule, based on the date they must be completed by.
Below are the fields on this worksheet and how to fill them in:
ORDER DATE – the date you received the custom order.
PRODUCT – the name of the product the customer ordered.
QTY – the quantity the customer ordered.
PRICE – the retail price of the customer’s order.
CUSTOMER INFORMATION – include information such as:
- Customer name
- Shipping address
- Contact information
- Product details (e.g. “Wants E.M monogrammed on bag” or “Ordered basic tote but in black suede”)
SHIPPING COSTS – note how much the item will cost to ship to the customer or if they plan to pick the item up at no cost.
TRACKING NUMBER – once the item is shipped, note the shipping tracking number in this space.
TOTAL – the total for the customer’s order, including: product price, shipping fees, and any additional costs for customization.
DEADLINE – note when the custom order must be completed by.
COMPLETED – check this box when the order is completed so it’s easy to see, at a glance, which orders must be slotted into an upcoming production schedule.
SHIPPED – check this box when the item has been shipped.
I hope these worksheets help you plan your production schedule and reach your sales goals each month!
You may also find these helpful:
- 10 TIPS TO QUICKLY PREPARE FOR A CRAFT SHOW
- THE EASIEST WAY TO INCREASE CRAFT SHOW SALES BY 27%
- 5 THINGS CRAFTERS WASTE THEIR TIME & MONEY ON
Check out THE SUCCESS PLANNER if you’d like more guidance and worksheets to help you plan, organize, and execute tasks for all areas of your business so you can reach your sales goal for the year.


Hey, I’m Erin 🙂 I write about small business and craft show techniques I’ve learned from being a small business owner for almost 2 decades, selling at dozens of craft shows, and earning a diploma in Visual Communication Design. I hope you find my advice helpful!