How To Photograph Your Handmade Goods
Photographs of your handmade goods are almost as important as the handmade goods themselves. When you’re selling online they act as your salesperson and give the shopper an idea of what your business is all about.
Poor-quality photos can indicate to online shoppers that your business is poorly run or that the quality of your photos reflects the quality of your products and they won’t take a chance buying.
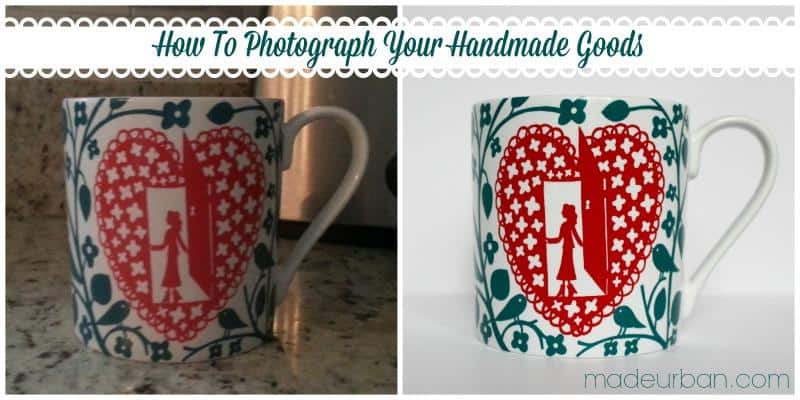
This article will show you how the smallest changes when taking a photo can make a huge difference in the result. Check out the series of photos below and then read the changes that were made in the text that follows.
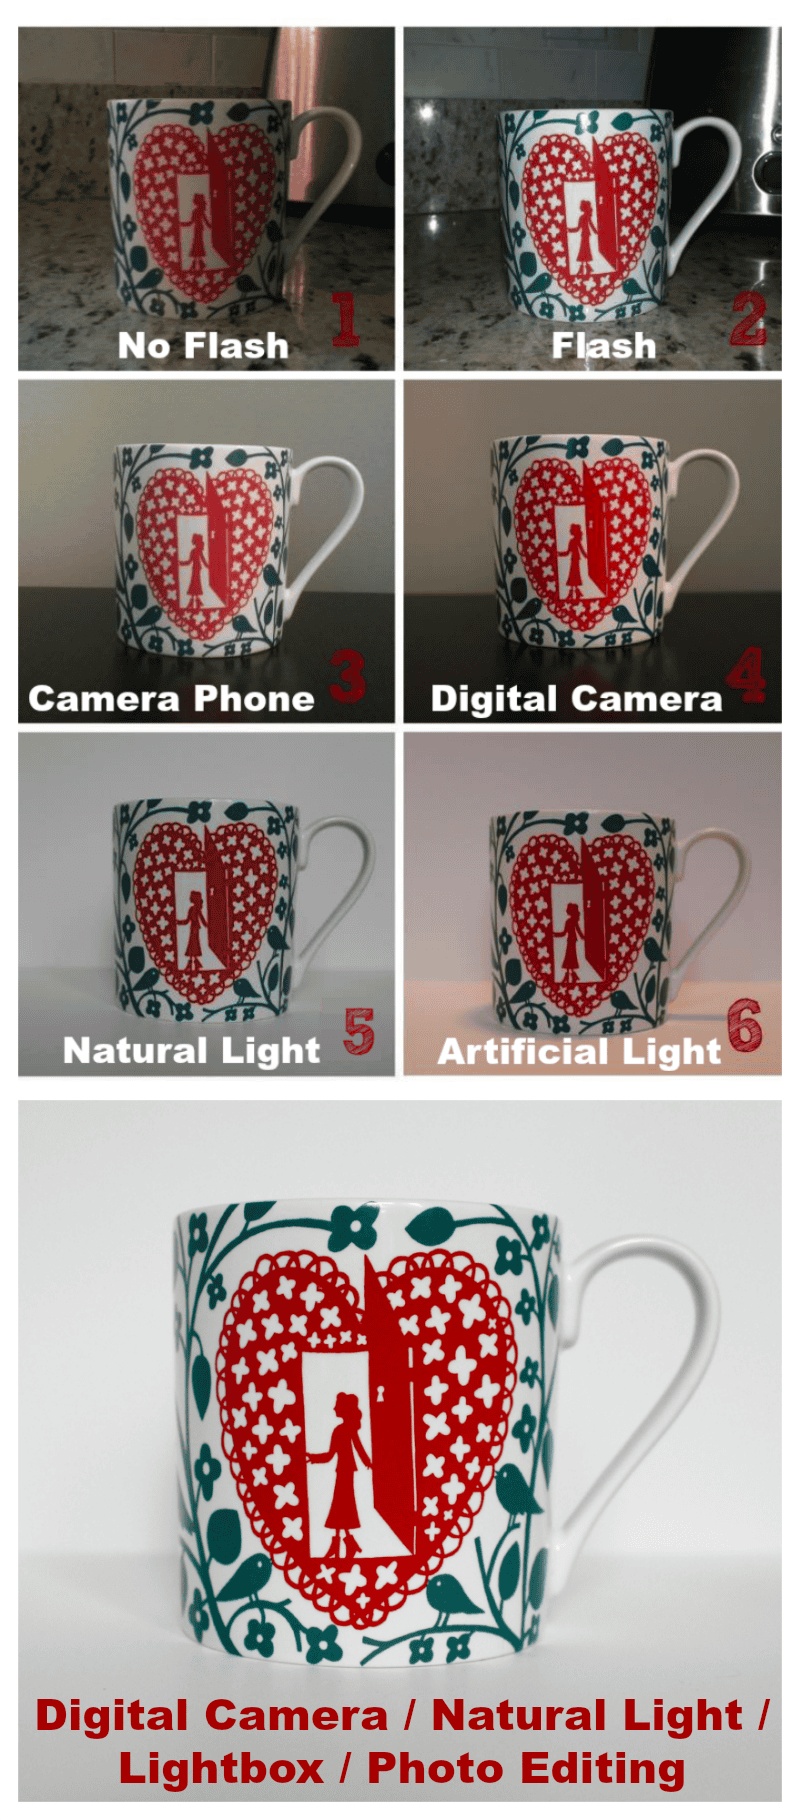
Photo #1
Lighting: no flash and a bit of natural light. There is a window in the room, which is west-facing and slightly behind and to the left of the subject.
Background: it’s a bit distracting with a patterned countertop that competes with the mug’s pattern and there’s also a toaster hanging out.
Photo #2
Type of camera: Samsung phone camera
Lighting: flash and same natural light as the last photo
Background: Same background as last photo
Using the flash is a common mistake made when taking photos. Although it helps to light the subject, it creates glare, harsh shadows in the background and can throw off the color of your product.
Photo #3
Type of camera: Samsung phone camera
Lighting: no flash, bedroom light turned on and a little more natural light from a west-facing window to the left of the subject.
Background: less distracting background with the mug sitting on a coffee table and a clean wall behind it.
Photo #4
Camera: Canon Rebel EOS
Lighting: no flash and the same natural and artificial lighting as the last photo
Background: same as last photo
You can really see the difference in clarity and color for this photo due to an upgrade in camera.
Photo #5
Camera: Canon Rebel EOS
Lighting: moved the mug directly in front of a south-facing window; no flash/artificial light
Background: the mug was placed inside of the homemade lightbox (instructions for that are here)
You can notice how much more the subject stands out from the background. The pattern is clearer and colors are bolder. These photos were taken on an overcast day so there wasn’t any direct sunlight. You don’t want to place items directly in the sun or you’ll get the same effect as using a flash; there will be harsh shadows and the bright light will skew the colors.
Photo #6
Camera: Canon Rebel EOS
Lighting: same natural lighting however the bedroom overhead light was turned on
Background: lightbox
You’ll notice having the bedroom light on casts a bit of a yellow tone over the subject and background. It also starts to add some distracting shadows.
Final Photo
Camera: Canon Rebel EOS
Lighting: natural lighting directly in front of a south-facing window, no artificial light
Background: inside of the homemade lightbox
Editing: I edited the final photo using PicMonkey to brighten it up a bit more, reduce some shadows and increase the contrast.
Final thoughts
Camera: You can get by using your phone’s camera but you really will start to see the difference as you upgrade your camera.
Lighting: Don’t use your camera’s flash and try to avoid artificial lighting altogether. Using natural lighting will give you the best effect and you don’t need much to light the subject.
Background: The simpler, the better. Unless you have an eye for composition and creating stories with your pieces, stick to a simple, clean background. This one was really cheap and simple to put together and it makes a big difference.
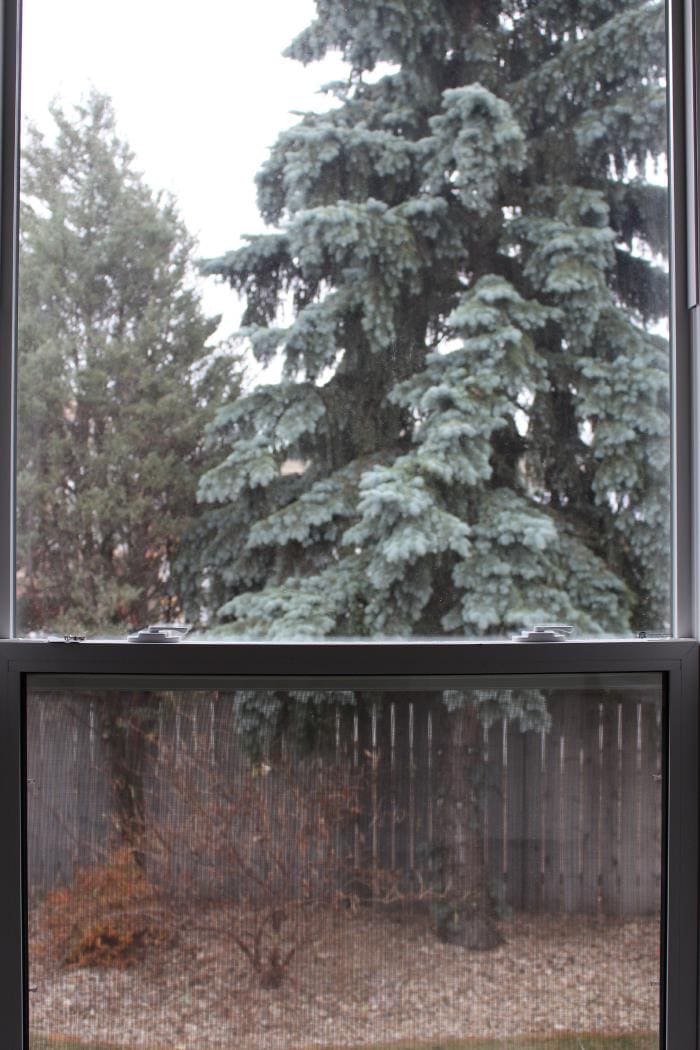
You can see how each little change makes a huge difference in the end product. You don’t a complicated backdrop nor do you need a ton of light; the photo below is the type of day I took these photos on and the view I had from the mug’s perspective in the last 3 photos.
I hope these simple tricks help!


Hey, I’m Erin 🙂 I write about small business and craft show techniques I’ve learned from being a small business owner for almost 2 decades, selling at dozens of craft shows, and earning a diploma in Visual Communication Design. I hope you find my advice helpful!
One Comment