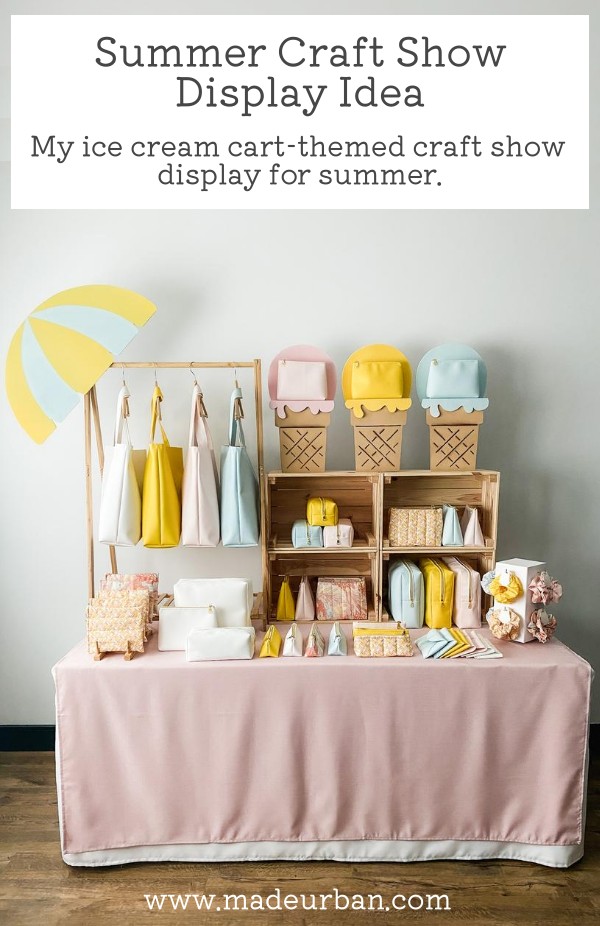
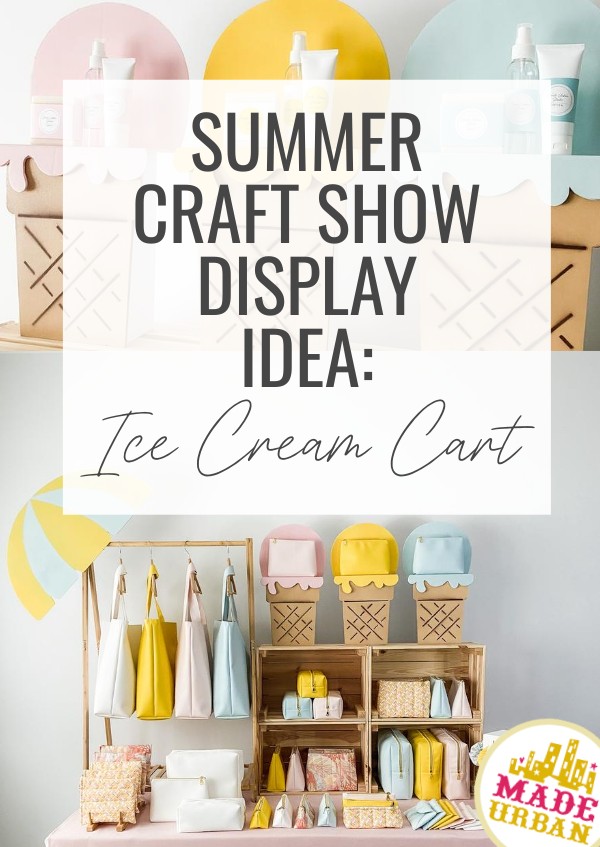
Summer Craft Show Display Idea: Ice Cream Cart
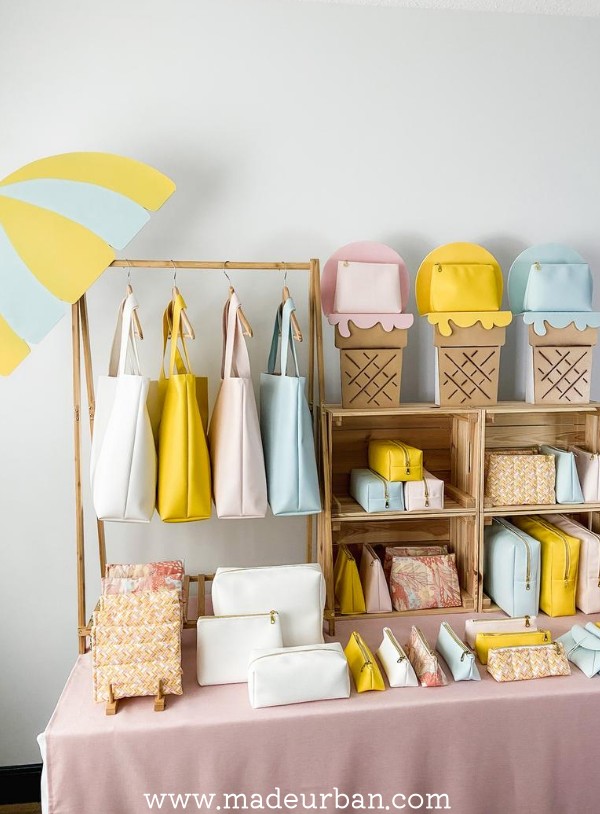
This article shares a summer craft fair display following an ice-cream theme. I’m working with bags but a variety of products could be swapped into this display with a few small changes.
*This article includes affiliate links, meaning I get a commission if you decide to purchase through my links, at no cost to you. Read full disclaimer here
Materials Used
- Foam core – to create the ice cream and umbrella props. Cardboard would also work if you have boxes that can be broken down. You can purchase your foam core board at a craft store (such as Michaels) and some dollar stores carry it too. Amazon has a variety of sizes and when you purchase bigger packs (e.g. a 12 pack) the price per sheet is fairly economical (around $5 – $6 per sheet).
- Spray paint – to color the ice cream and the umbrella prop. The colors I used are from Behr’s spray paint line (which I purchased at Home Depot).
Products
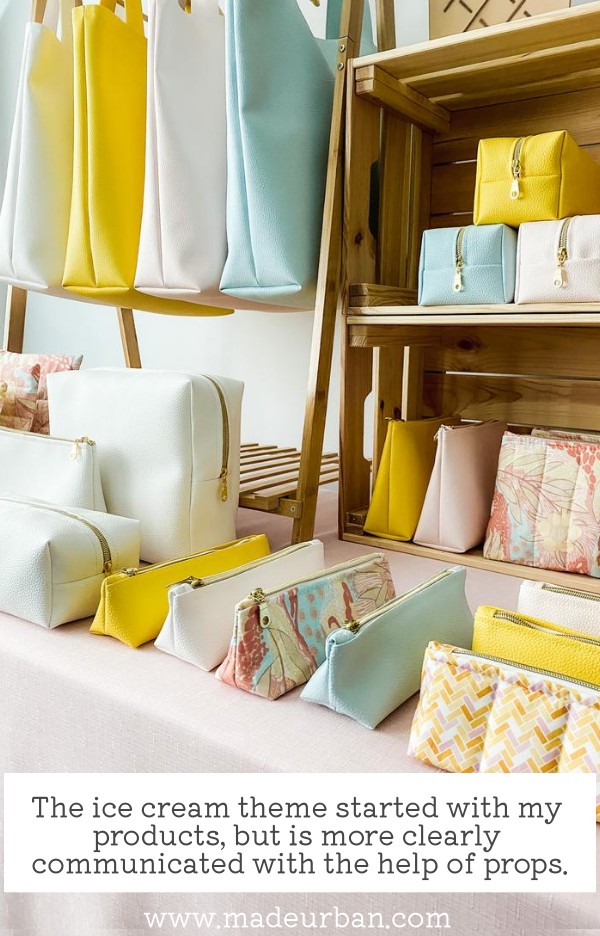
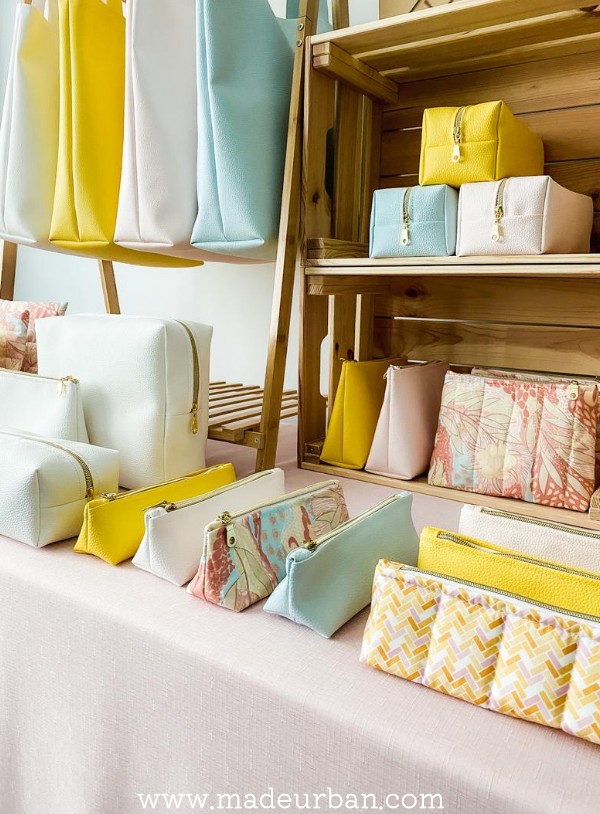
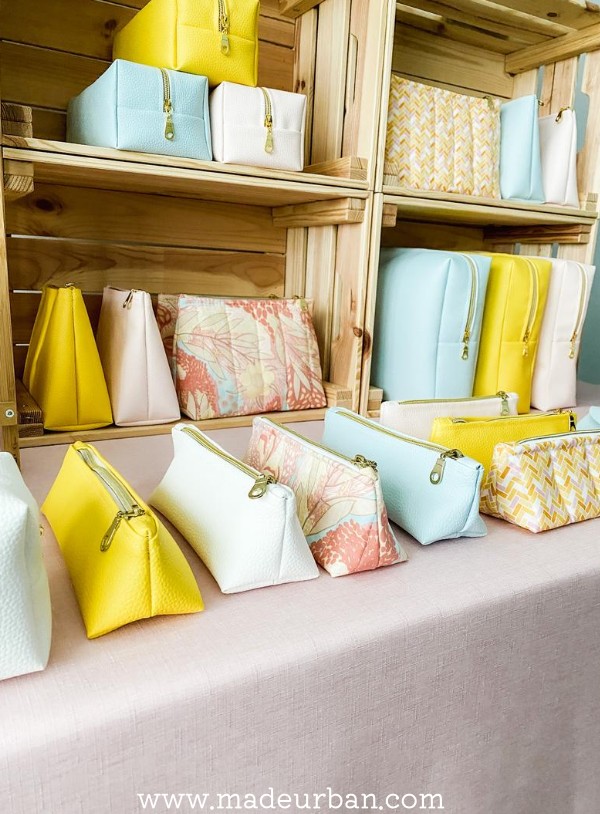
The foundation of a craft show display is its products. So when possible, think of your theme before creating products. Focusing my bags on yellow, pink, blue, and white creates a strong foundation for my ice cream theme.
Color
Again, the color of my display starts with my products. But my display becomes more eye-catching and cohesive when I repeat my products’ colors throughout my display.

Here’s are a couple of article on how to effectively use color in a craft show display:
- How to Use Color at a Craft Show to Attract Shoppers
- Craft Show Display 5-Minute Fix: Color Groupings
Fixtures
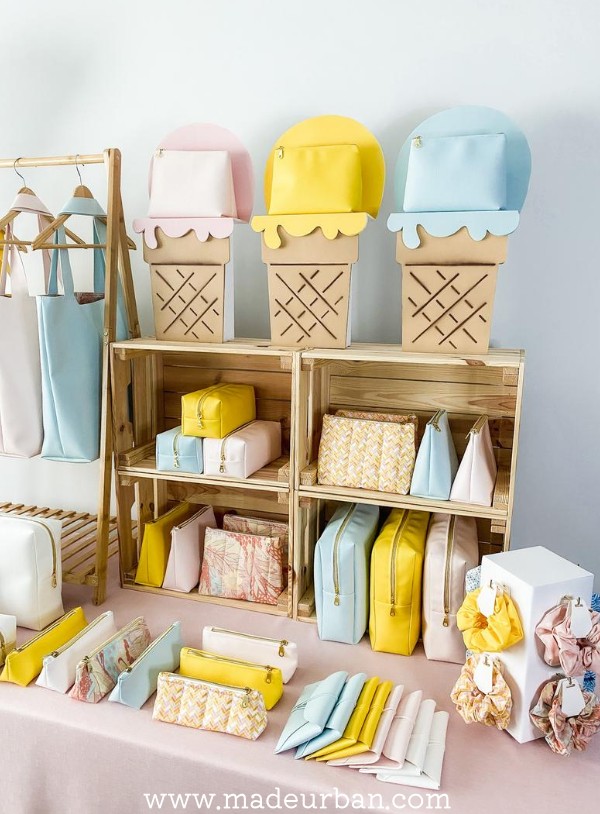
Another element that unifies this display is the fixture material. All of my fixtures are similar in that they’re all wood. They’re different types of wood and vary slightly in color, but when you stand back, they look cohesive.
If I were to introduce different colors of fixtures or too many materials (e.g. plastic, wicker, metal, etc.), it could distract from my display and products.

These are the fixtures used in my display:
- Kids’ clothing rack – this is the one I purchased. I like that it adds hanging space and folds flat for storage/transport. This rack is short enough that products can be reached when it sits on my table.
- Wood crates – I purchased mine from Ikea but you can find many different variations here. I like how sturdy the Ikea crates are, but they are a little heavy to be lugging around.
- Dish drying rack – I used this bamboo drying rack to display my Kindle sleeves. I like how this one angles up toward the back.
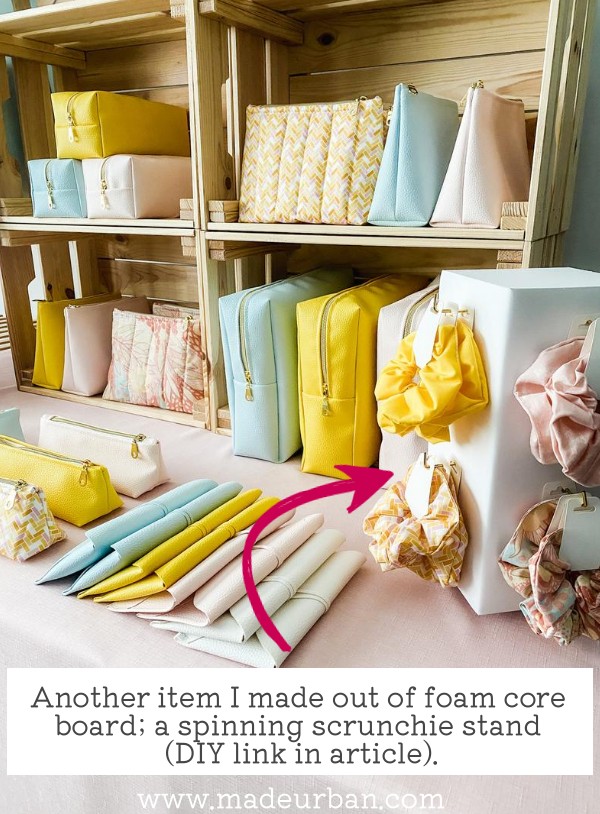
- Spinning rack – I made my spinning rack (displaying scrunchies) out of foam core board. You can find the instructions and video explaining how to make one here: How I Made a Spinning Scrunchie Stand for Markets
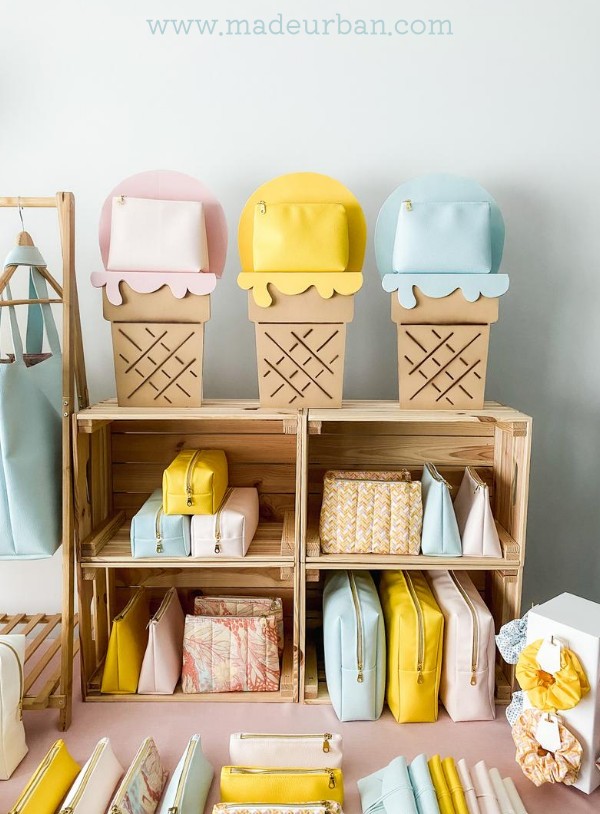
Props
I made my umbrella and ice cream cones out of foam core board. However, cardboard is also a good option if you have pieces that are big enough. It may take a few more coats of spray paint to cover the cardboard color or any printing/text on it.
When working with foam core board, I’ve found spray paint to be ideal for adding color. I’ve tried craft paints but most have too much moisture and it ends up warping the board. Other options are to add touches of color with markers, or using construction paper to cover the foam core board.
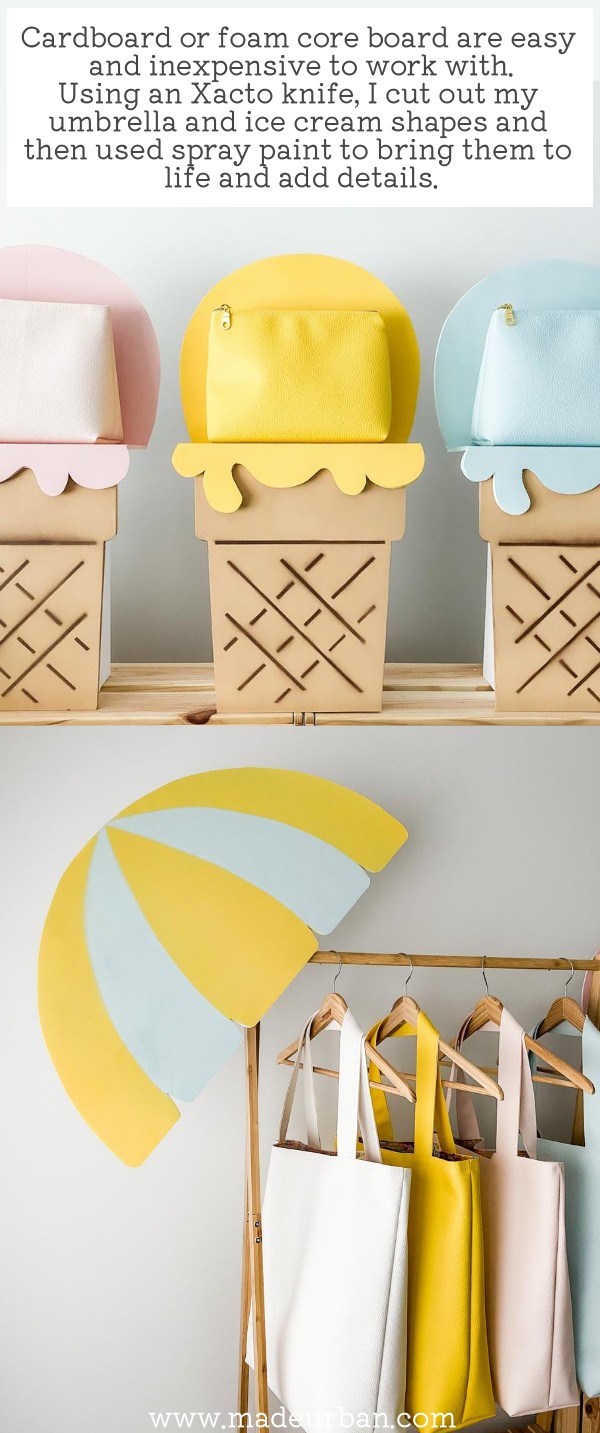
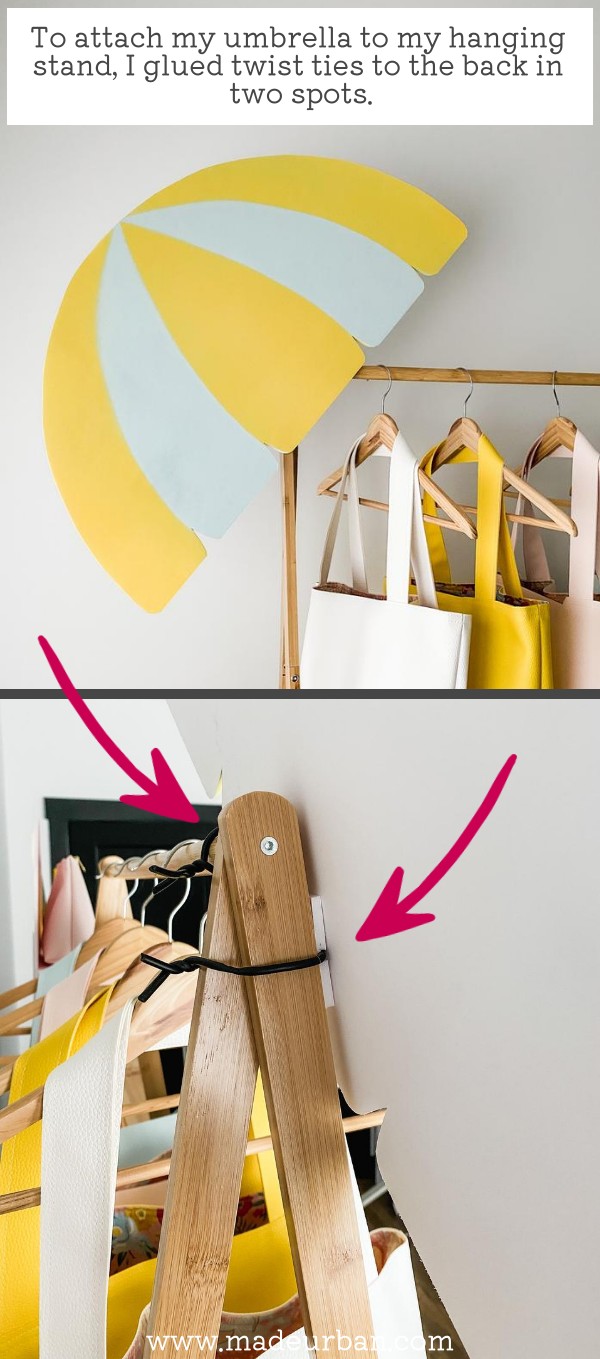
I simply sketched my umbrella shape onto my piece of foam core board and cut it out using an Xacto knife. After spray painting, I used my hot glue gun to attach two pieces of twist-tie to the back (I sandwiched the twist-tie between another piece of foam core board and the back of the umbrella), which allowed me to easily add it to my fixture.
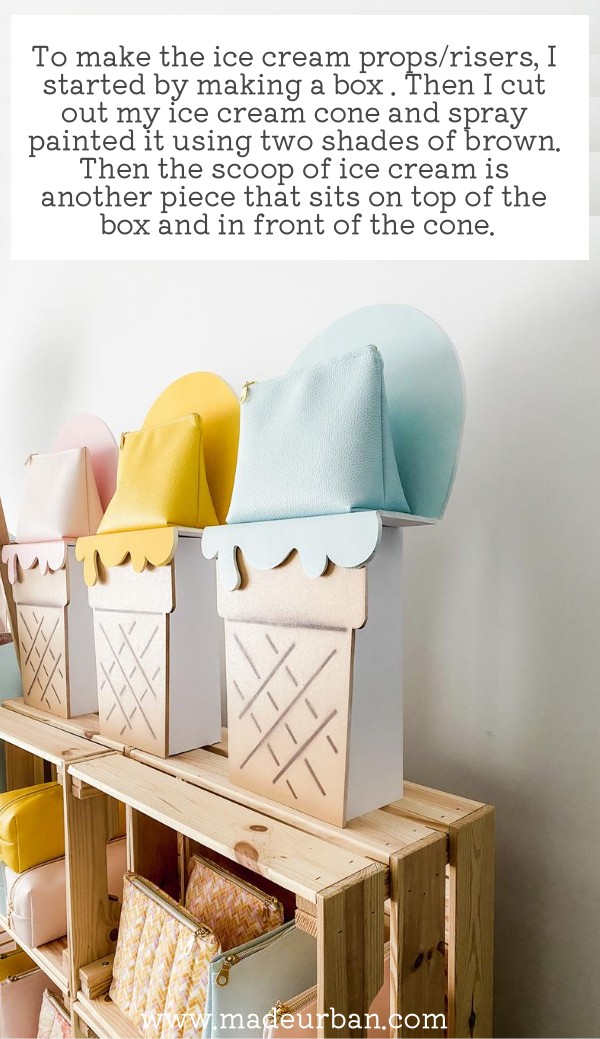
The ice cream cones are 3 pieces:
- A box that acts as a riser and creates a solid base (looking at the photos now, I could spray paint the box the light brown color so it’s less obvious from the side).
- The ice cream cone, which sits in front of the box/riser.
- The ice cream scoop, which is one piece that I scored so I could bend the ice cream shape forward, then down so it sits on top of the riser and in front of the cone (hopefully the photo below helps explain).
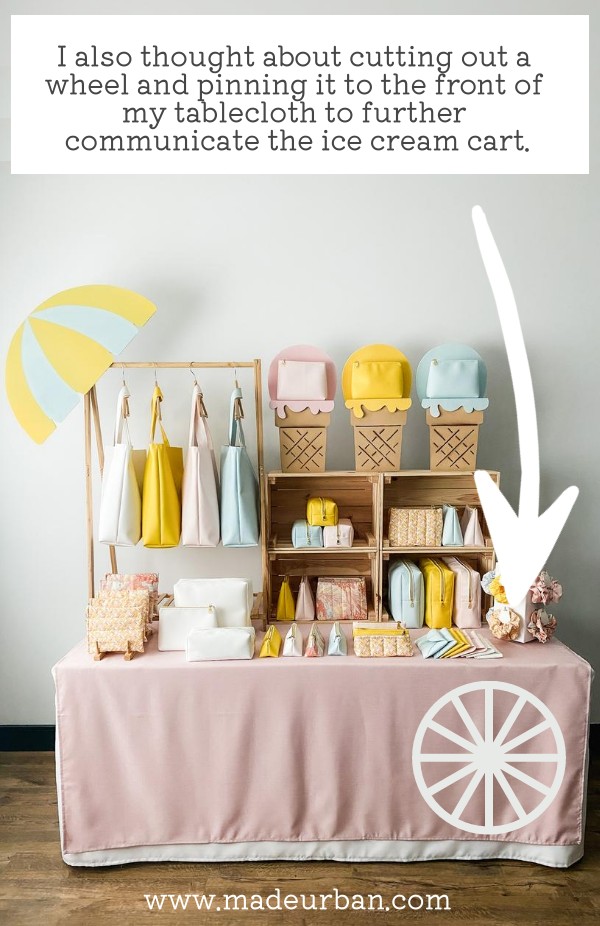
I also thought about cutting out a wheel shape and pinning it to the front of my tablecloth (but I ran out of foam core board;) Here’s a mockup of what it would look like. I think it further strengthens my ice cream cart theme.
Tablecloth
I purchased this tablecloth, and it turned out to be the perfect shade of pink. My table is 6 feet wide and I did get a tablecloth that’s slightly smaller to save on costs. But I like the look of it, acting more like a table runner, as it creates less bulk on the sides of my table.
Variations
This theme and a similar setup can work for a variety of products with a few small tweaks.
For example:
- Bath and body products could be swapped in by replacing the kids’ clothing rack with another set of crates or a small shelf.
- Jewelry could be displayed by swapping in pegboards or other racks that allow you to hang jewelry and using a few fixtures that allow you to display a necklace, earrings, and bracelet on top of the ice cream prop risers.
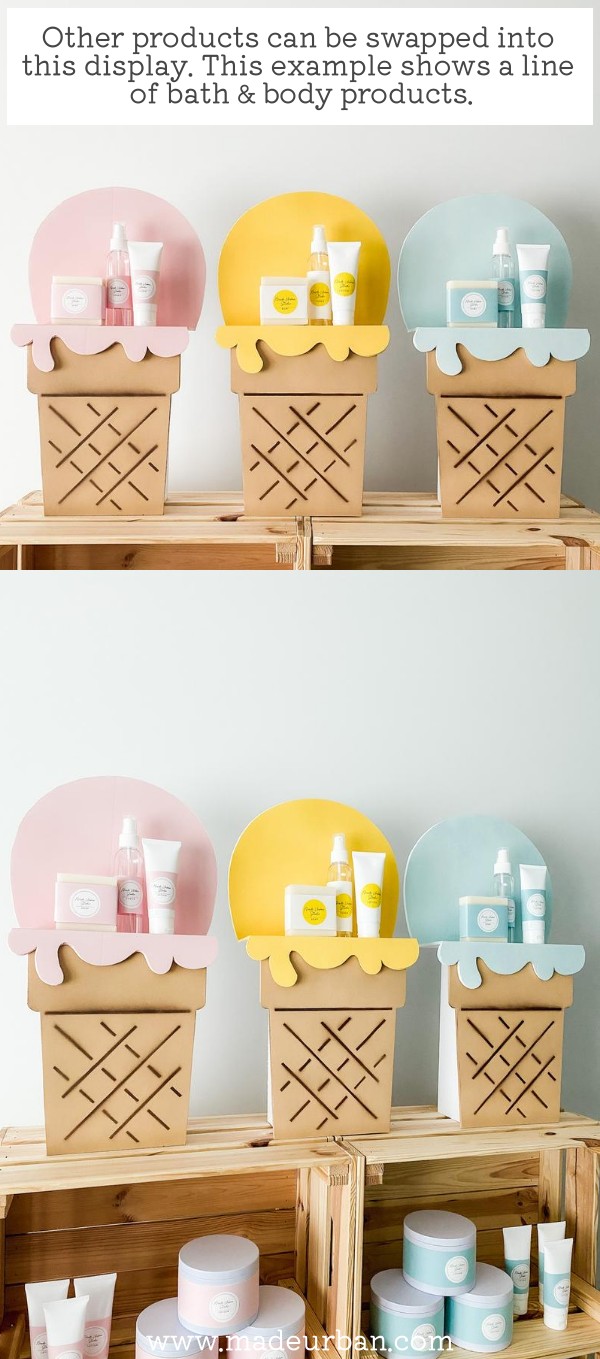
You can also spray paint the props any color you like. If your products are more colorful and have lots of color variation, you may keep the scoops of ice cream white and use markers to add colorful sprinkles to the ice cream.
I hope these photos spark some ideas for your next summer craft show display!

Hey, I’m Erin 🙂 I write about small business and craft show techniques I’ve learned from being a small business owner for almost 2 decades, selling at dozens of craft shows, and earning a diploma in Visual Communication Design. I hope you find my advice helpful!