How To Make an Oversized Scrunchie to Sell
As we head into 2024, consumer searches for scrunches holds steady (and high). This year, an oversized, jumbo scrunchie is on trend lists, so I’ve created a sewing tutorial for one.
>> Check out this year’s craft trends
In this article, you’ll find instructions for the quickest and easiest way to sew an oversized scrunchie, as well as pricing tips so you can sell your scrunchies for a profit.
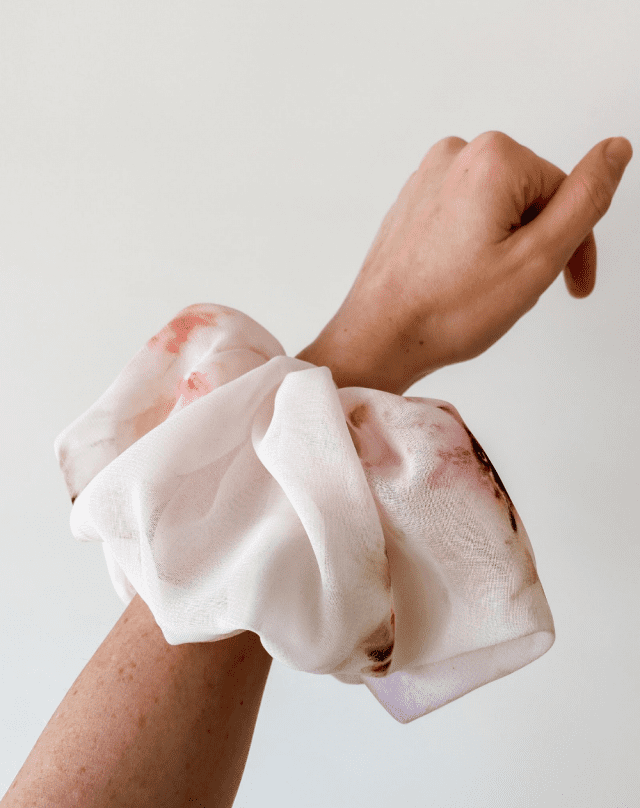
This is an XXL sized scrunchie. Its jumbo size makes a statement when worn on the wrist or in the hair. Keep reading for the steps explaining how to make a large scrunchie.
Oversized scrunchie supplies:
- Fabric
- 1/8” wide elastic
- Thread
- Sewing machine
- Safety pin or bodkin (to pull elastic through)
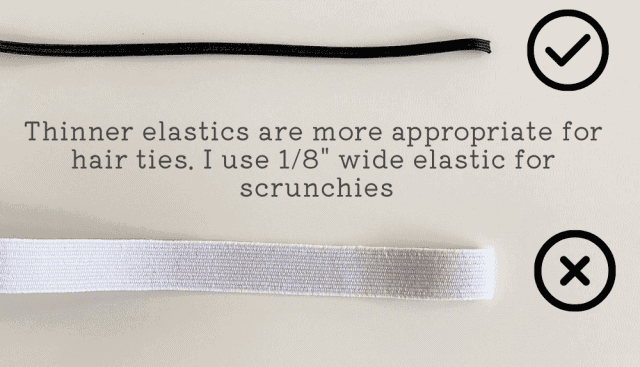
Scrunchie elastic
Many tutorials suggest using flat elastic that’s 1/4” – 1/2” thick. I don’t find this type of elastic works well in the hair. Instead, I suggest using 1/8” wide round or flat elastic.
This type of elastic can be tied in a knot to create a loop, and it won’t cause too much bulk. This method is much faster than sewing the two ends of the elastic together.
Scrunchie elastic length
Cutting my elastic 8″ long allows me to use the ballon knot method to tie the ends of the elastic together and cut off any excess (which is much faster than gluing and/or sewing the ends together).
This makes the circumference of my scrunchie elastic about 7″, which is comfortable to wear around most wrists and allows the scrunchie to wrap around a ponytail at least twice (depending on the thickness of hair).
If you want to create scrunchies for a target market with thick hair, consider using scrunchie elastic length of 9″ or longer.
Step 1 – Determine Size & cut fabric
You can use these same steps to create a regular sized scrunchie, which would require a piece of fabric closer to 20″ long x 3″ wide.
Jumbo scrunchie fabric measurements
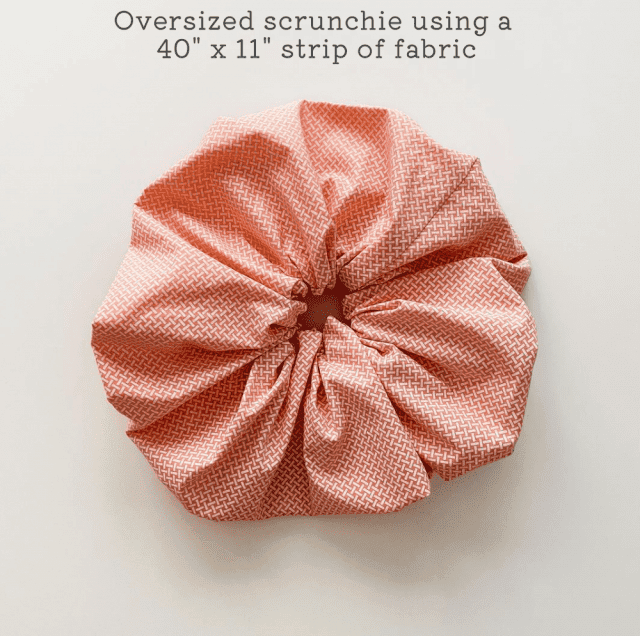
To get that “jumbo” scrunchie look, I suggest cutting your fabric 40″ long and 11″ wide.
I’ve sewn 3 different jumbo sizes to show how much more ruffling you get with each length:
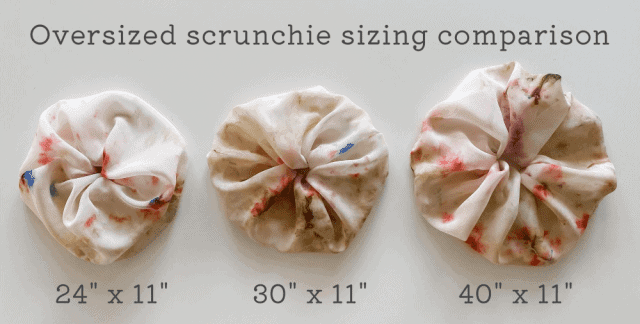
- 24” long x 11” wide
- 30” long x 11” wide
- 40” long x 11” wide
You can adjust the length or width to your preference.
The 40” length gives more of a traditional “scrunchie” look in the oversized scrunchie. The shorter your piece of fabric, the less ruffling you’ll get and the fabric will gather more like a rose.

Step 2 – Serge seams (optional)
If you’re working with a sheer fabric or one that frays easily, you’ll want to serge the edges. Alternatively, you can use a zig-zag stitch, or a product like Stop-Fraying (which is probably the quickest and cheapest option).
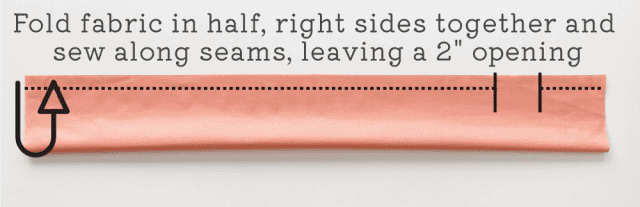
Step 3 – Sew lengthwise
Fold the strip of fabric in half, lengthwise, placing right sides of the fabric together. Pin in place if needed.
Leave a gap that’s approximately 2” wide, so you can turn the scruchie right side out eventually.
Sew along the edge leaving a 1/2” – 5/8” seam.
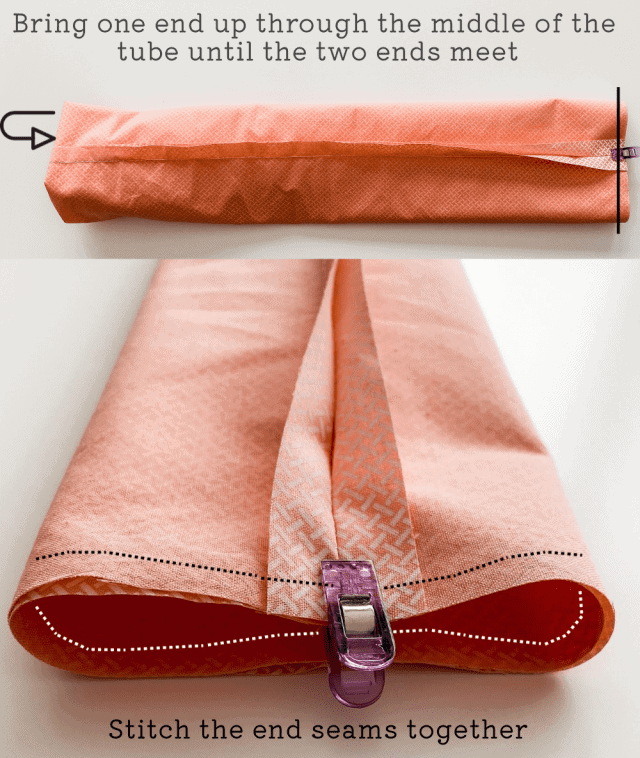
Step 4 – Turn tube and sew ends together
When creating an oversized scrunchie, you should be able to get your hand through the middle of the tube, grab the end and bring it back up the middle of the tube, so both ends meet.
If your tube is too narrow to fit your hand through, attach a large safety pin to one end of the fabric and then feed that safety pin up through the tube until the two ends of the tube meet.
Line up the two ends and sew around the end of the tube.
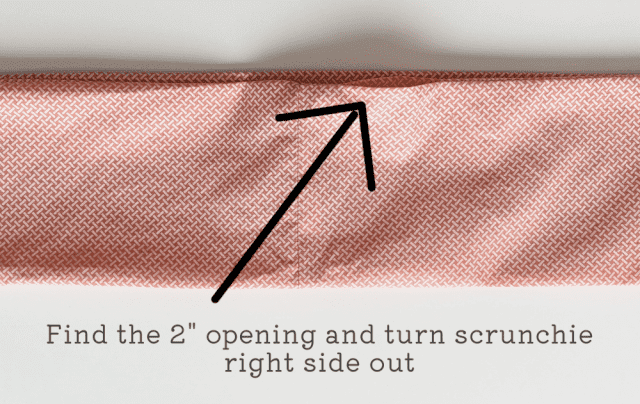
Step 5 – Turn right side out
Find the 2” opening you left along the lengthwise seam and turn the scrunchie right side out.
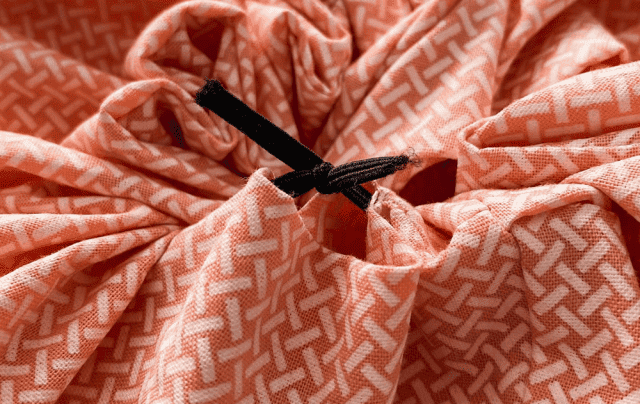
Step 6 – Add elastic
Place a safety pin or bodkin at one end of your 8” long elastic and pin the other end to the opening in the scrunchie.
Thread it through the opening.
Tie the ends of the elastic together using a double knot or tie the elastic like you would a ballon.
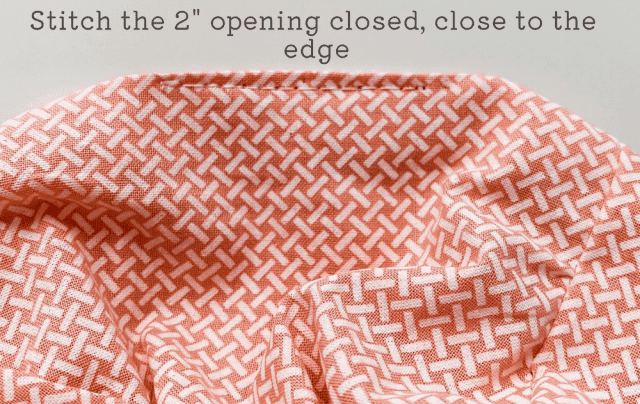
Step 7 – Sew opening closed
Find the 2” opening and pin the edges together. Sew as close as you can along the edge, so the stitching is less noticeable.
If you’re creating a luxury scrunchie brand, and can charge more for your scrunchies, you may consider hand-stitching the opening closed using a ladder stitch so you can’t see the stitching. This creates a cleaner, high-end look, but it takes more time than top-stitching using a sewing machine.
Sewing scrunchies to sell
Here are a few tips to consider when you’re sewing scrunchies, or oversized scrunchies to sell.
Fabric
It’s important to put your target market’s wants/needs first and choose fabric colours, materials, prints, etc. based on their preferences. However, it’s important to keep the fabric’s qualities in mind and how easy it will be for you to work with.
A chiffon material is beautiful, but it adds and extra step to ensure the edges don’t fray. That means your costs go up and profits go down (unless you can raise the price without your target market questioning why they’re more expensive).
Thicker fabrics aren’t ideal for scrunchies, especially oversized scrunchies, as they become heavy in the hair.
Silk scrunchies are popular, but working with silk is more difficult due to it being slippery. Consider getting small clips to keep seams together without causing damage to the material the way pins can.
Sizing
Adjust the size of your scrunchies based on how your supplier cuts your fabric (e.g. by the yard or meter) and the width the fabric comes in. For example, if the bolt of fabric is 42″ wide, consider making the length of your scrunchies 42″ (minus the salvaged edges).
- 1 yard = 36”
- 1 meter = 39.37”
If I was buying fabric by the yard, I would make my scrunchies 36” long. This makes calculating prices really simple.
Let’s say I buy 3 yards of a fabric that’s 54” wide. I would adjust the width of my scrunch fabric to 10.5” wide and 36” long, so I could get 5 scrunchies out of 1 yard, with very little waste.
- If I buy 3 yards of fabric at $10/yard = $30
- 5 scrunchies per yard (at 3 yards) = 15 scrunchies
- 30 divided by 15 = 2
$2 of fabric per scrunchie
Pricing
As a handmade business, you should never try to position yourself as the “cheapest”. Larger businesses that can mass-produce their scrunchies will always beat your pricing. So you must determine who your scrunchies are for so you can determine your market position.
Are you making and selling scrunchies for teens? Their budget will be lower than if you’re selling luxury scrunchies using high-end materials for professional women.
Your target market will help determine the price range you can sell your scrunchies in.
The second rule of pricing is to make sure you’re covering all your costs: production costs, overhead costs and your hourly wage for the time it takes you to make the scrunchies, market them, and sell them.
Consider costs such as:
- tags and packaging
- shipping materials
- Etsy listing fees or craft show fees
- time required to:
- photograph a scrunchie
- tag a scrunchie
- list the scrunchie online
- package a scrunchie to ship
- drive to the post office and mail an order
At the end of each month, your monthly sales should cover all your monthly costs and wages, and leave you with money (profit).
You also want to consider markups so you can sell your scrunchies wholesale to retailers or on consignment. And don’t forget to add in profit so you’re not simply earning back the money you spend.
>> For a detailed pricing guide, check out this article: How To Price Handmade Scrunchies To Sell
Building a scrunchie business
If you’re making scrunchies to sell, you may also be interested in these articles:
>> The Fastest Way To Sew Scrunchies (To Sell at Craft Fairs)
>> How To Make a Scrunchie Display Stand (for under $25)
>> How to Create a Scrunchie Collection
>> How To Price Handmade Scrunchies To Sell
I hope you found this article helpful!

Hey, I’m Erin 🙂 I write about small business and craft show techniques I’ve learned from being a small business owner for almost 2 decades, selling at dozens of craft shows, and earning a diploma in Visual Communication Design. I hope you find my advice helpful!