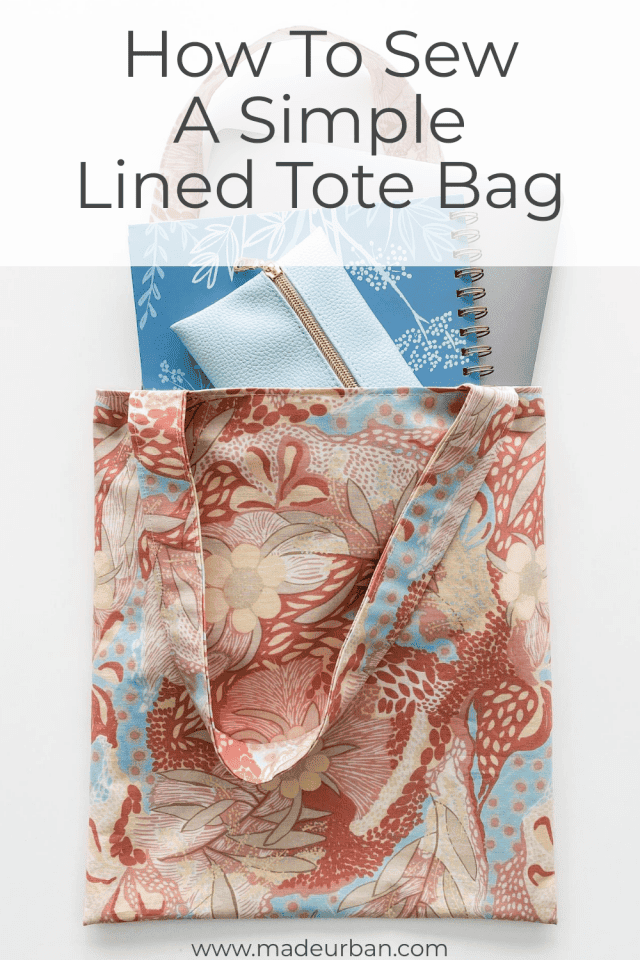
How to Sew a Simple Lined Tote Bag (that looks professionally made)
This pattern requires minimal sewing and is easy to follow. These fabric tote bags are perfect for keeping folded up in your purse or glove box and use when you stop at the store but forget to bring your reusable grocery bags.
This free tote pattern doesn’t have pockets but you can easily add them.
DIY Lined Tote Bag
Follow the 8 simple steps below to sew a lined tote bag in less than an hour.
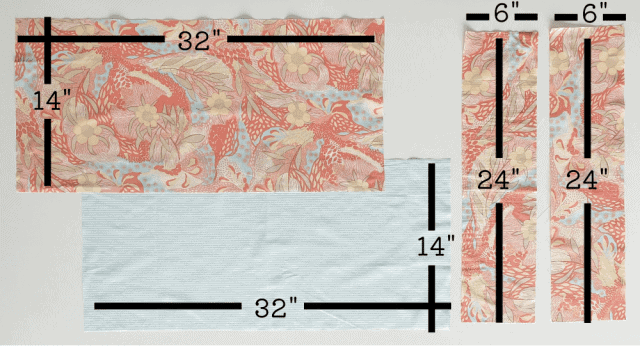
Step 1 – Cut tote bag, lining, and handles
Using the measurements provided, you’ll end up with a finished tote that is 12-3/4” wide by 15-3/8 tall. The handles are 1-1/2″ wide when finished.

You will need to cut:
- Tote exterior: 32” x 14” rectangle in outer fabric
- Tote lining: 32” x 14” rectangle in lining fabric
- Handles: 6” x 24” rectangle X 2 in outer fabric
Pro Tips
If you’re sewing lined tote bags to sell, these tips will help you decrease your production time and increase profits:
- To speed up cutting, fold your fabric in half and cut a 16” by 14” rectangle out, with the bottom of the rectangle being right on the fold (don’t cut the bottom of the rectangle). When you unfold your rectangle, you’ll have a 32” x 14” rectangle. You can follow this technique for the handles as well.
- If your fabric is easy to work with (i.e. not slippery, not too thick), layer your outer fabric and lined fabric on top of each other and then cut your rectangle so you cut both pieces at once.
- It’s important your fabric is free of wrinkles as they can cause inaccuracies in your measurements. Iron your fabric before cutting.
How to adjust the size
Adjust the bag size according to your needs by simply deciding on the height and width you want, then adding 1-1/4” to the width (for 5/8″ seam allowance on both sides) and and 5/8” to the height (for seam allowance on the top).
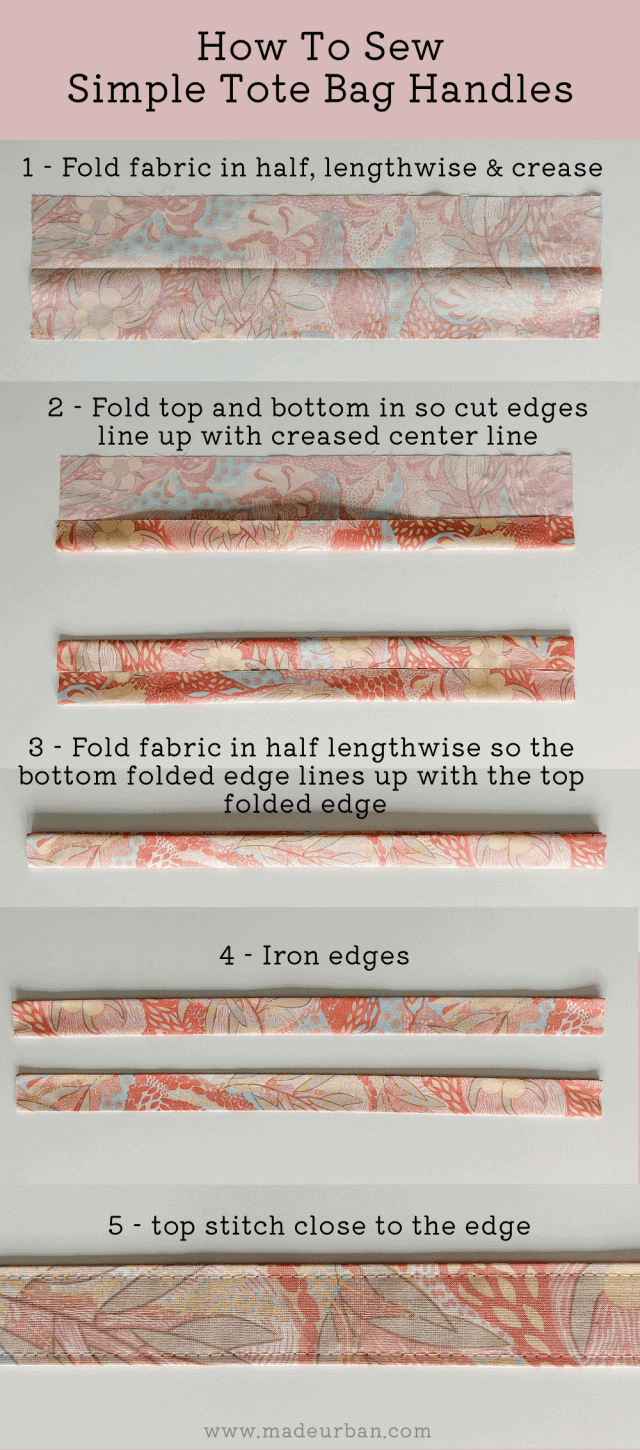
Step 2 – Sew handles
Fold your handle in half lengthwise to find the centre and press a crease into it.
Fold the top and bottom in, lining up the cut edge with the centre crease.
Fold the handle in half again, lengthwise.
Top stitch on either side of the handle, closer to the edge.
Pro Tip
If you’re working with a fabric such as a cotton, simply hand press at first, and then iron once the handle is completely folded. This will save you a bit of time.
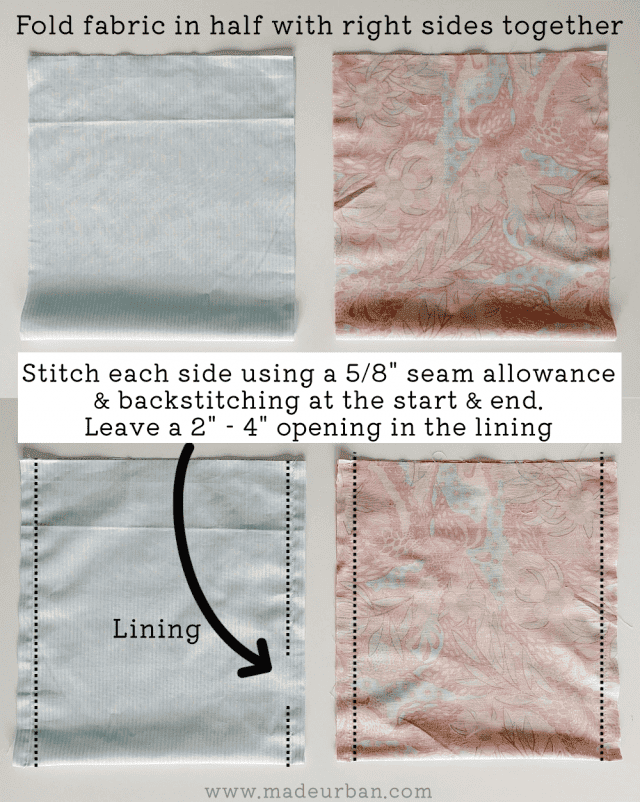
Step 3 – Sew sides
Fold your rectangles in half so the right sides of the fabric are together.
Stitch down the left and right side, using a 5/8” seam allowance and backstitching at the top and bottom of your seam.
Repeat this step with your lining but leave a 2” – 4” break in the stitching, as this opening will allow you to turn the bag right side out.
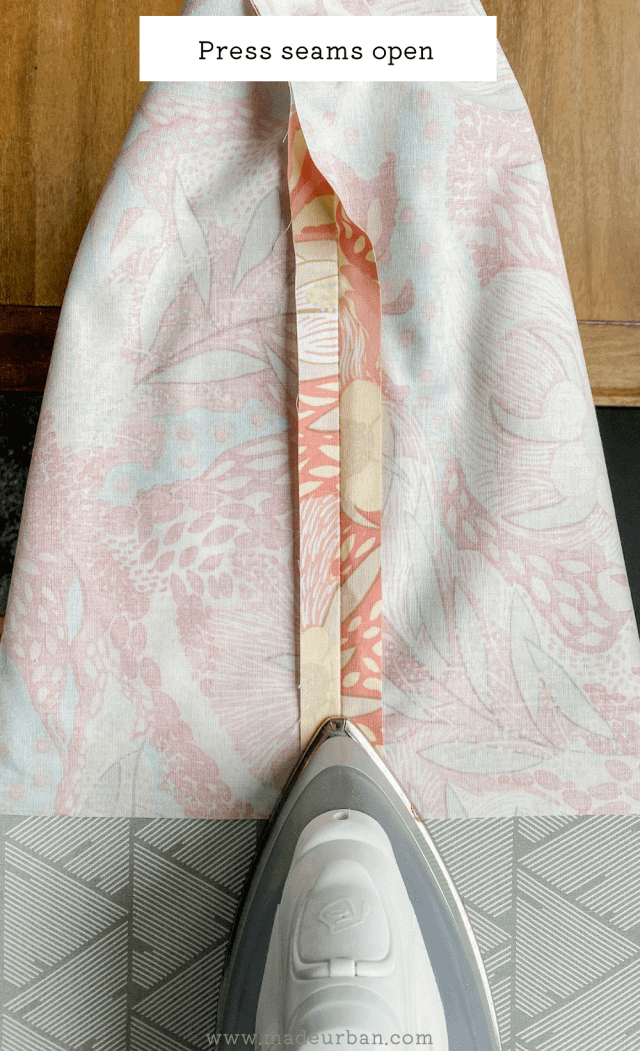
Step 4 – Press seams
Pressing your seams will create a more polished and professional looking finished product.
Open the fabric along the seams you stitched and press them flat using an iron.
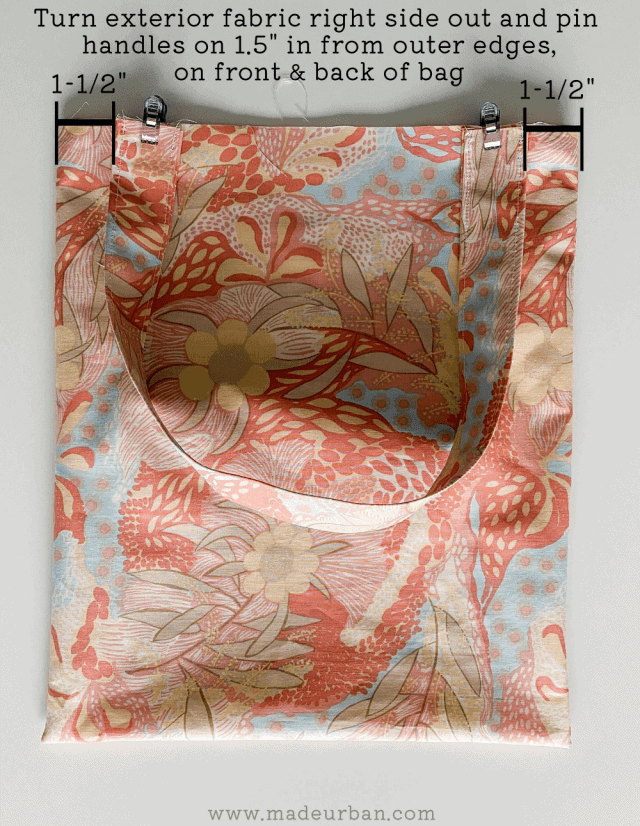
Step 5 – Attach handles to tote exterior
Turn your exterior fabric right side out, using a point turner to fully push the bottom corners out.
Measure 1-1/2” in from the outer seams and pin your handles in place (you don’t have to sew them in place right now because they’ll be sewn in when you stitch your lining and bag exterior together).
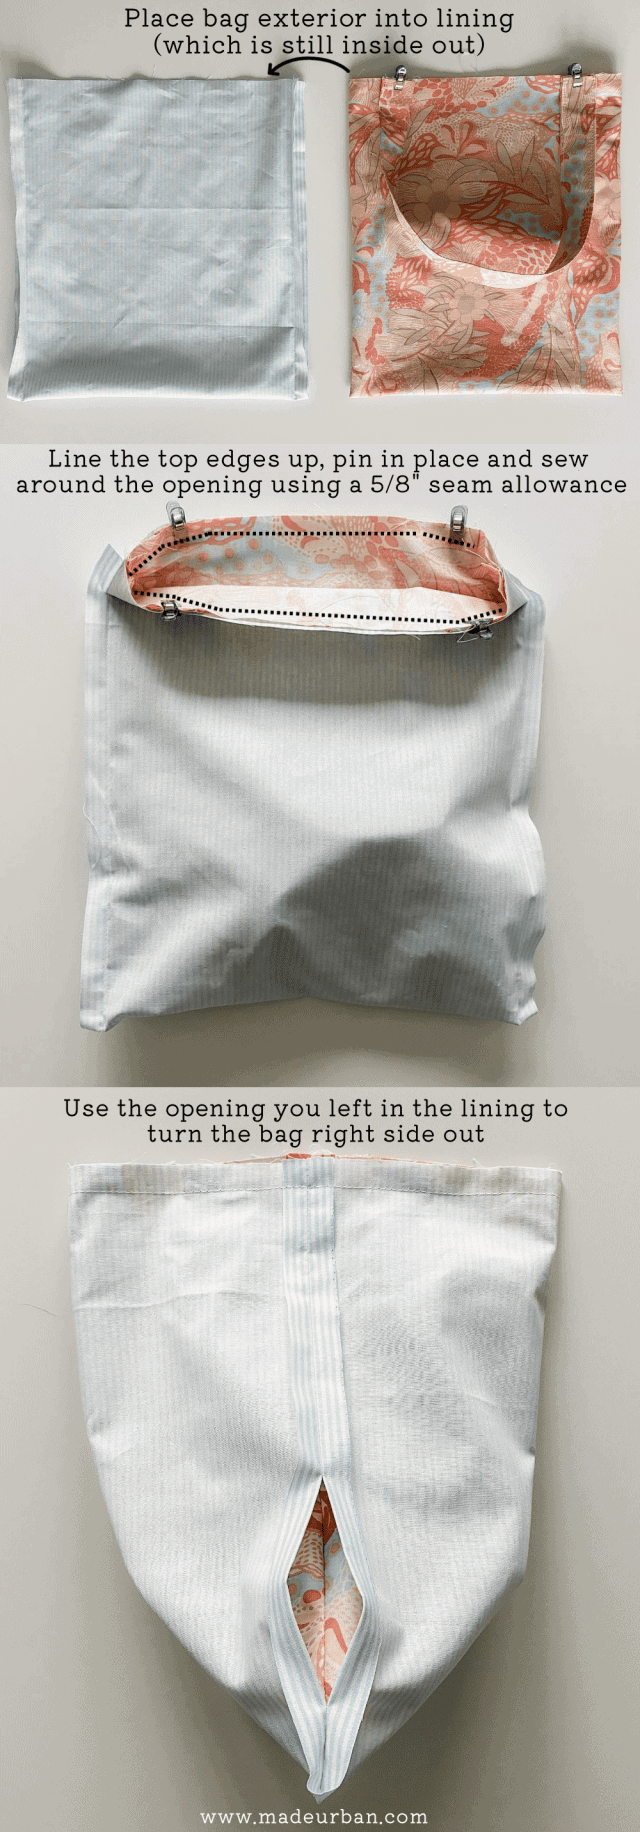
Step 6 – Attach lining to bag exterior
Keep your lining turned inside out so you can place the lining’s and bag exterior’s right sides together.
Place the bag exterior inside the lining.
Line up the top edges and pin in place.
Stitch around the top opening of the bag, using a 5/8” seam allowance.
Turn the bag right side out using the opening you left in the lining.
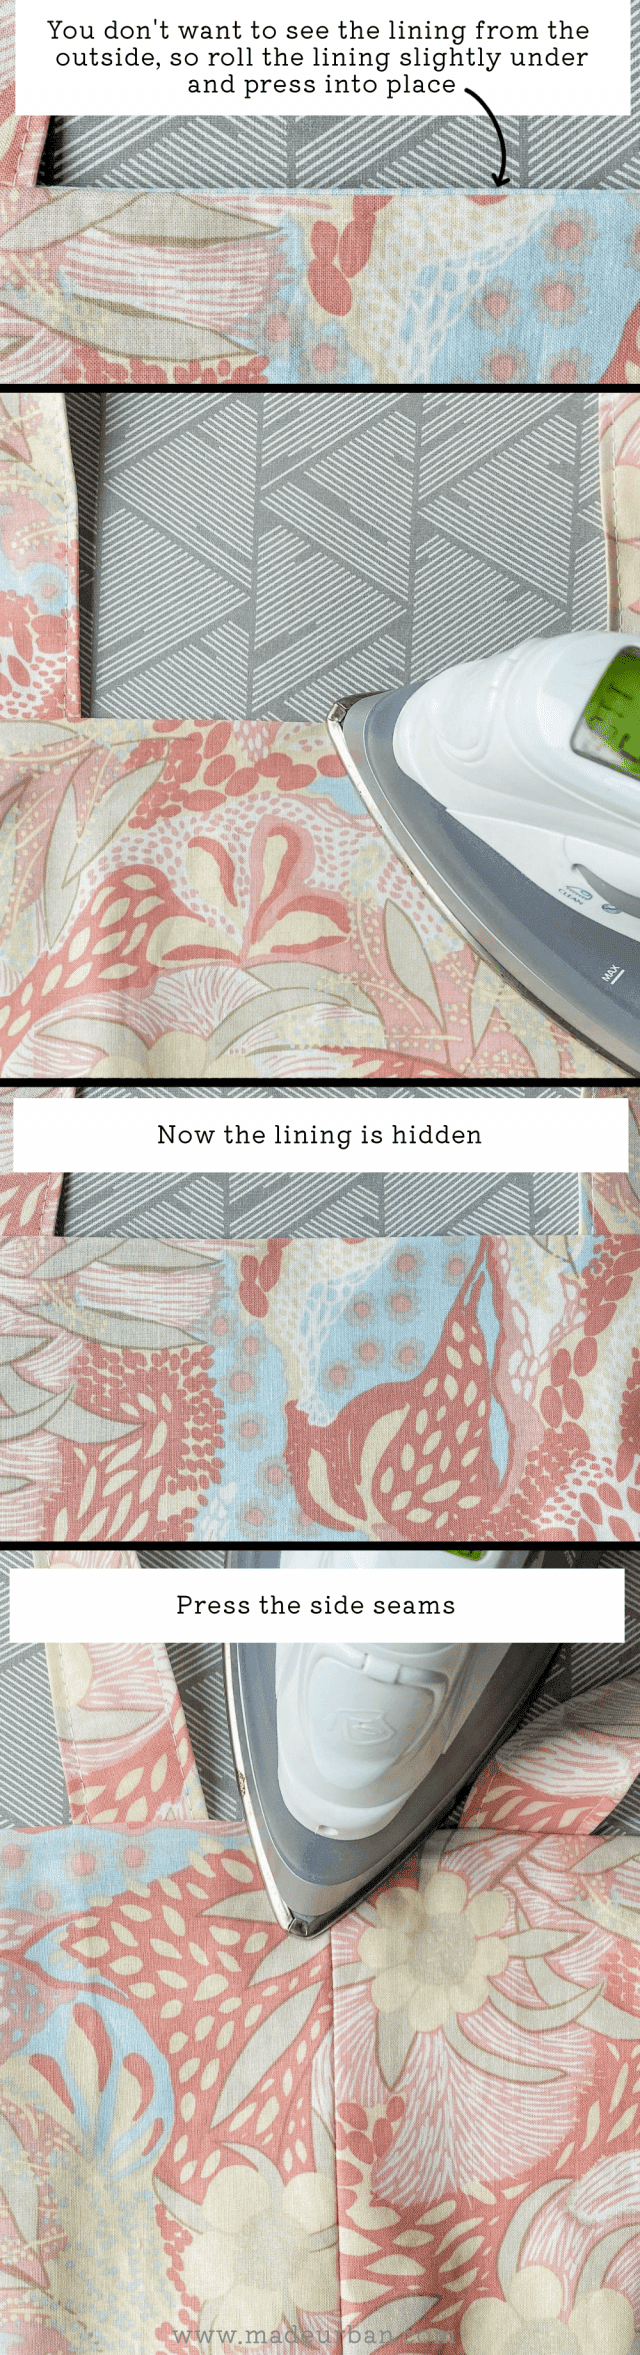
Step 7 – Press bag opening
Roll the top edge slightly under so from the outside, you can’t see the lining.
Iron around the opening of the bag.
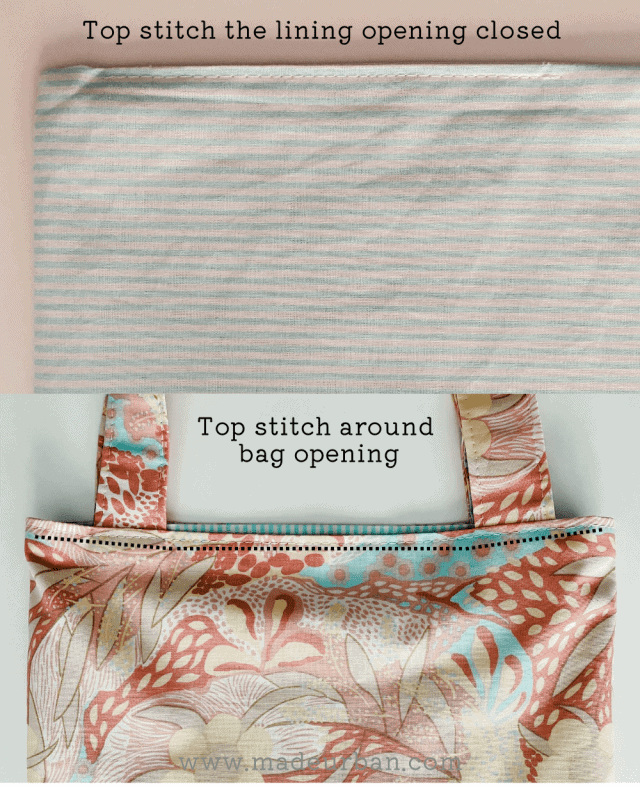
Step 8 – Top stitch
Close the opening in the lining by top stitching close to the edge.
Finish off the bag by top stitching around the opening of the bag, close to the edge.
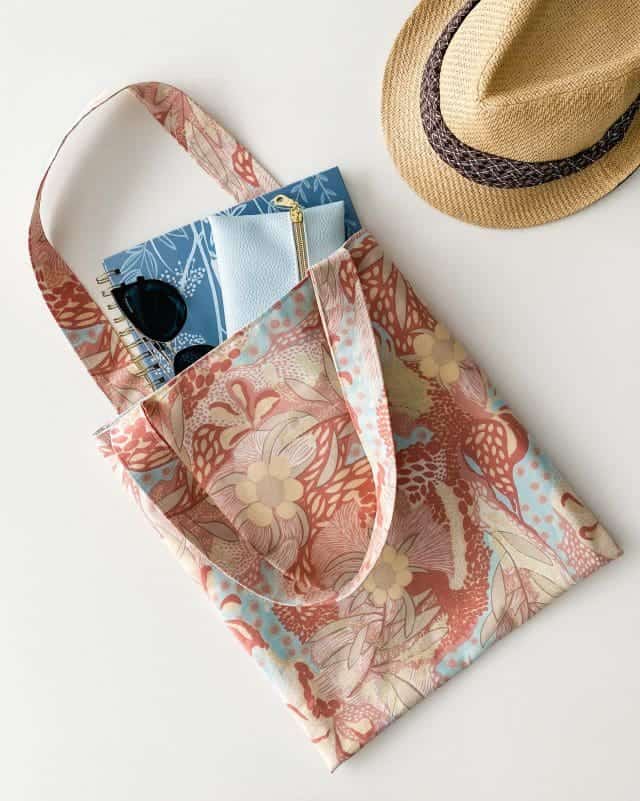
Lightly press any wrinkles and your lined tote bag is ready to use or sell!
If you plan to sell your lined totes, follow this pricing guide: The Right Way to Price a Handmade Product (Step-by-Step Formula)
Happy sewing!

Hey, I’m Erin 🙂 I write about small business and craft show techniques I’ve learned from being a small business owner for almost 2 decades, selling at dozens of craft shows, and earning a diploma in Visual Communication Design. I hope you find my advice helpful!