The Biggest Mistake Craft Show Vendors Make (with their display)
With more than a decade of setting up, shopping, and reviewing craft show displays, I’ve learned from many mistakes.
The biggest mistake I see vendors make with their craft show display is:
Displaying everything they make.
Your craft show display should not be treated as a stock room.
A craft show display should tell a story.
Why you shouldn’t treat your booth as a stockroom
You have just a few seconds to grab a shopper’s attention and encourage them to stop at your booth.
Shoppers cannot take in everything you have to offer in those few seconds.
Trying to communicate every type of product you make and all the options you offer creates overwhelm.
It’s like trying to tell a stranger your life story in the first few seconds of meeting them.
When you first meet someone you just want to share a few details about yourself and divulge more once you know you’re compatible.
Let shoppers get to know your business first, and then tell them more about your products and what you have to offer.
Displaying too many products in your space means:
- there isn’t a visual break between products; one type of product blends into the other
- you can’t create groupings (essential for telling stories)
- it’s hard to shop the space (shoppers may be worried about knocking something over or putting it back the right way)
- you lower the perceived value of your products
Imagine a rack full of clothes in a variety of colors vs. a rack that uses a few select pieces in the same style or color story.
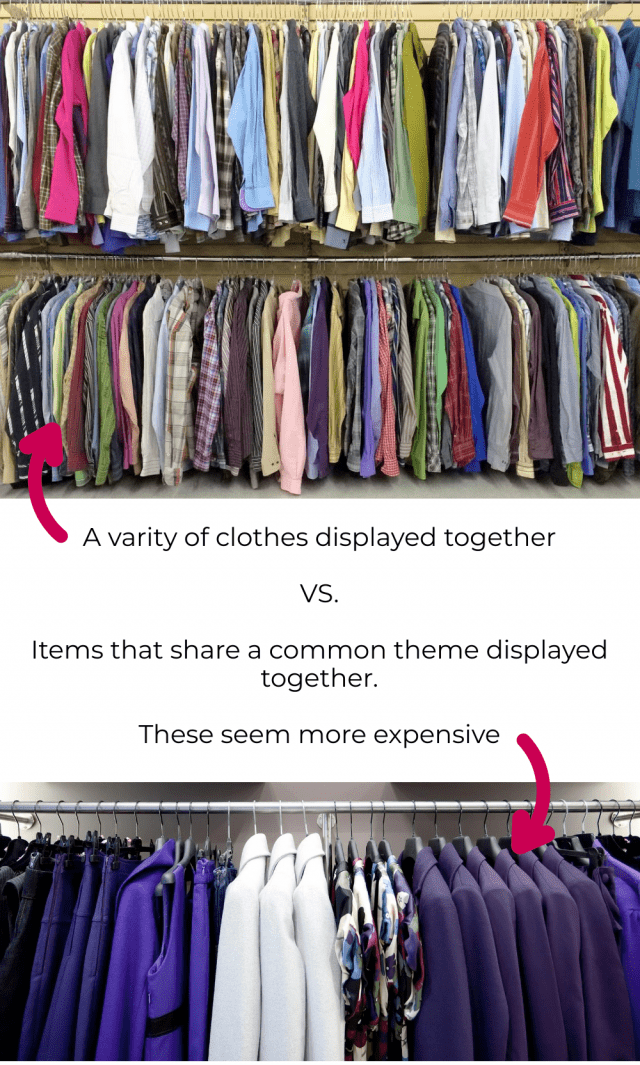
The products on the second rack seem more expensive because of how they’re displayed.
If you want shoppers to pay top dollar for your handmade products, your craft show space should feel like a boutique; not a thrift store.
Choose your best products to display on your craft show table and keep additional stock behind or under the table.
Keep your stock organized in bins so if you’re chatting with a shopper and uncovering their needs, you can easily pull out more options for them to choose from.
Telling a story
Every good product display tells a story.
A story helps a shopper understand:
- what type of products you sell (it should NOT be a little bit of everything; that can harm sales (here’s proof))
- who the products are for (your target market)
- where, when, and how they will use your products
Bonus points if your display can immediately tell shoppers why they should buy from you. In other words, your USP (unique selling position). Why are your products different and/or better than the others on the market?
>> 8 Mistakes Handmade Businesses Make with their USP
A story should evoke a feeling and help paint a picture.
If shoppers can’t imagine where, when, or how they’ll use your product, they won’t buy it.
Here are a few things to consider to tell your display’s story:
1 – where do you picture your products being used?
What is the typical setting you imagine your products being worn/displayed/consumed/used in?
For example:
- bath products will be used in the bathroom
- jewelry may be worn to holiday parties
- art may be created for the kitchen
Think about your target market and get specific.
Where will your target market use your products?
Then think about subtle ways you can help suggest that setting through colors, props, and signage.
For example:
- A loofah, rolled-up towels, and a crisp white tablecloth can subtly suggest a bathroom setting.
- A darker-colored tablecloth (perhaps in velvet), a few Christmas ornaments, and maybe even the soft sounds of Christmas music in your space will get shoppers thinking about Christmas parties.
- A mixing bowl, rolling pin, and apron can help tell the story of baking-themed art displayed in a baker’s kitchen.
You don’t want your props to take over your display. Keep them simple and subtle.
2 – which colors work together?
Color is the quickest and easiest way to evoke a feeling or emotion.
If you haven’t already planned your product collections around a color, you may be able to group your existing products to help tell a color story.
>> here’s how to plan product collections: How to Use Product Collections to Boost Sales
For example:
- soft blue, soft green, and white communicate “relaxing”, or “beachy”, or “feminine” (depending on the product).
- red and black can tell a romantic story
- deep green, brown, and burgundy may help communicate “nature” or “natural”.
Grouping by color or color stories is the most effective, but you can also create groupings based on:
- prints (e.g. floral print grouping, stripe and polka dots grouping, and animal print grouping)
- scents (e.g. floral, lemon, and spice)
- shapes (e.g. pillar candles and tapered candles)
- styles (e.g. minimalist pieces and statement pieces)
- subject (e.g. landscape photos, animal photos, and flower photos)
- etc.
Look at your products and determine if you can divide them into cohesive color stories, focusing on 1 – 3 colors each.
3 – which products would be commonly used together?
Groupings help tell a story and can be created with items that would be used or purchased together; not alternatively.
For example, dozens of necklaces would not be worn together. A necklace, ring, bracelet, and pair of earrings would be worn together (if they match).
Displaying them in the same grouping helps a shopper imagine being fully accessorized for a holiday party.
Determine which products your target market might use together and display them in a grouping. Ideally, the items within a grouping should follow the same color/style/scent/etc. story.
This not only creates a more interesting and cohesive display; it also helps increase units per sale (e.g. instead of someone buying just a necklace, they notice the matching ring and buy two items).
Limit how many groupings you have.
A craft show table might have 3 – 5 groupings (depending on the size of the products).
There should be space between each grouping to create separation and ensure the groupings’ stories don’t blend together.
More Details
If you’d like more help designing your craft show display, check out: 5 DAYS TO A STANDOUT CRAFT SHOW DISPLAY
It’s a free email challenge with 5 important lessons about designing a craft show display that stands out.
You may also be interested in these display tricks: Want to Stand Out at a Craft Show? Try these Display Tricks
Planning ahead
Storytelling should start with product collections.
Think about the story you’d like to tell before you start buying materials and making products.
For example, if I make jewelry and Valentine’s Day is coming up, I might plan a red and gold product collection, a heart collection, and a black and silver collection.
When your story starts with your products, it makes it easy to carry that story into your display.
>> How to Use Product Collections to Boost Sales

Hey, I’m Erin 🙂 I write about small business and craft show techniques I’ve learned from being a small business owner for almost 2 decades, selling at dozens of craft shows, and earning a diploma in Visual Communication Design. I hope you find my advice helpful!