10 Ways to Display Tote Bags at a Craft Show
Tote bags are one of the trickier items to display on a craft show table. Some styles don’t stand on their own and the styles that do, tend to take up a lot of table space.
So here are my tips for creating a craft show display that includes totes, the fixtures and accessories I recommend, as well as some DIY suggestions.
Displaying tote bags versus Stocking tote bags
I have broken ideas into 2 sections:
- Displaying tote bags
- Stocking tote bags
Let me quickly explain the difference between the two.
Imagine a top shown on a mannequin versus it being folded on a table or side-hung on a rack among dozens of other tops.
The top displayed on the mannequin will grab more attention and get shoppers interested in it.
But shoppers need to be able to pick up the top, see the front and back, feel the material, find their size, etc.
So both ways of merchandising the top are essential; on the mannequin to grab attention and stacked/hung for people to shop the top and find their size/color.
>> Top shown on mannequin = Display
>> Top folded or side hung with additional sizes/colors = Stock
Your craft show table or booth should both display a few tote bags and house stock.
There isn’t a right or wrong way to display purses and bags at a craft show.
However, based on my visual presentation education and experience, a well-merchandised display has a mix of display and stock.
How to Display tote bags at a craft show
Here are a few ideas to add a “display” element to your craft show table and showcase your most popular style of tote.
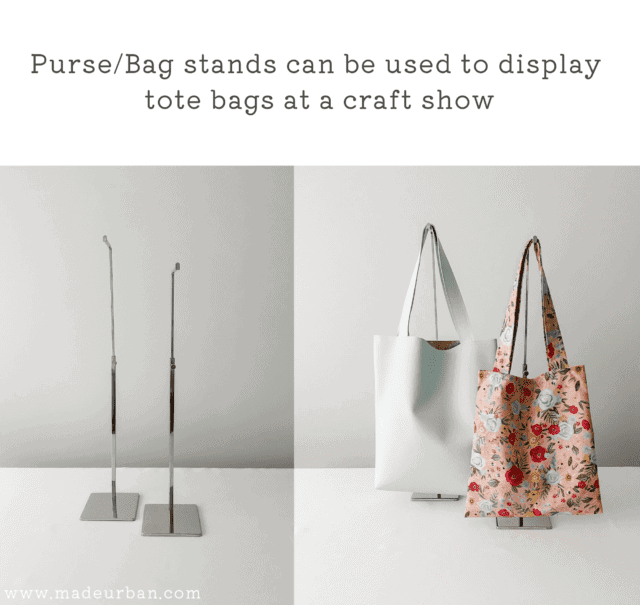
1) Bag Stand
A bag stand is the type of display fixture most retailers use to display tote bags.
When I worked as the regional visual merchandiser for a major retailer, they would use these types of stands on table displays. One bag would be showcased next to a bust form, and that bag would be a color/style that complimented the top and bottom stocked on the table.
These display stands are designed to display one bag only.
Purse stands come in a variety of colors and finishes. Amazon has a good selection, but you may be able to find some in a local store.
This is the one I purchased and is shown in the photo below. The quality is okay. I do have to constantly tighten the screw and on one of them, if it’s extended all the way, the extension doesn’t sit perfectly straight.
Tip
When purchasing a bag display stand, make sure the height is adjustable and that it extends to the height you need for your tote bags.
2) Hang bar with S-hook
When you use a regular S-hook on a hang bar, it will allow you to display a tote bag; meaning, it faces forward.
There are several ways you can incorporate hanging space into your craft show display, depending on how much space you have:
Over the table rod
I purchased mine from Ikea. You can find them on Amazon as well, but I liked how Ikea’s is a round rod, so hangers and hooks easily fit on it.
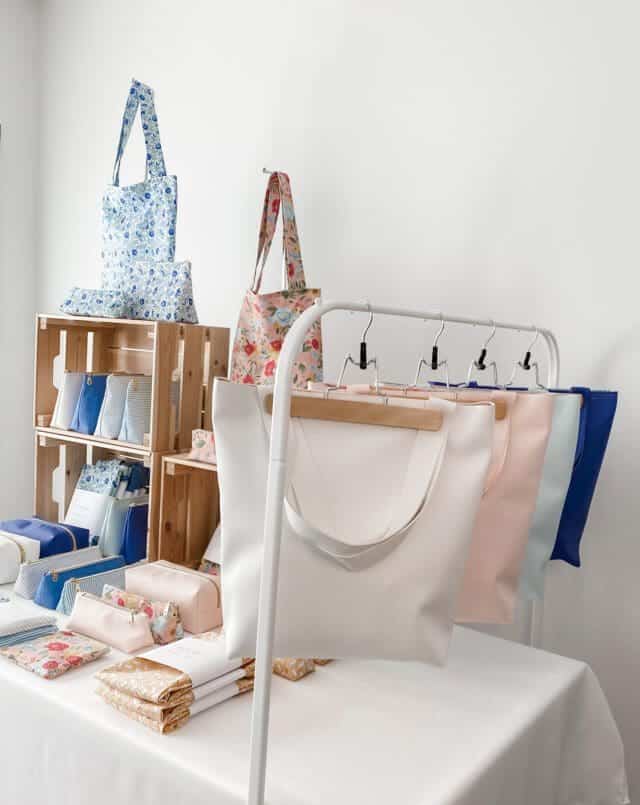
Tabletop hanging fixture
You may find various options for these types of fixtures. I purchased a children’s dress-up hanging rack (you can find it here), which is a good height and size to fit on a small craft show table. This one also folds up, so it’s easy to transport and store. However, there are many options if you search “kids clothes rack”.
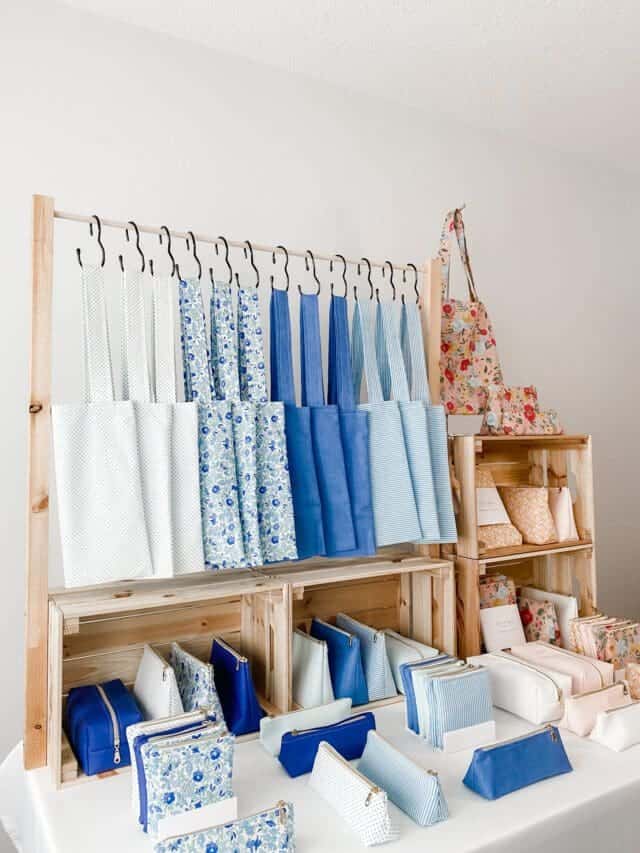
DIY table rod
You can easily make hanging space by using two crates, pieces of wood and a dowel. I cut 2 pieces of wood and drilled holes in the top to fit my dowel through. I then pre-drilled two holes at the bottom of the 2x2s so I could screw them into my crates.
Rollbar
If you have a larger space, you can use a rollbar. If you only have an 8 foot space, you may opt for a shorter table and place a rollbar at the end of it. Remember, your fixtures can’t spill out of your allotted space (organizers do NOT like that).
You may also have the option to set the rollbar behind your table and use it to display bag styles. You may even be able to set the rollbar up so the top sits over your table. Just be sure it doesn’t create a tripping hazard for shoppers.
I purchased my rollbar from IKEA for less than $20. It doesn’t fold down without unscrewing the bolts (but it is quick and easy to take apart/set up). It’s lightweight, so easy to transport.
There are many rollbar options on the market. A collapsable one may be preferable if you don’t have a lot of trunk space.
If you’re selling at an outdoor event and have a 10×10 tent, you can even create a hanging bar. Use a sturdy dowel, drill a hole on each end big enough to fit an S-hook or a sturdy piece of rope through. The tie the rope to the roof supports of your tent.
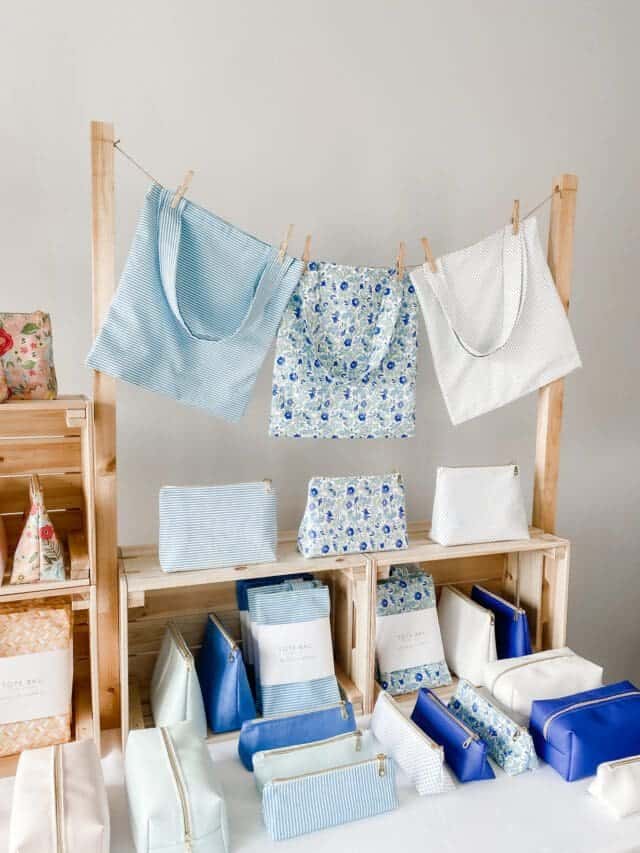
3) Clothesline
If you have a way to string a rope from one side of your table or booth to the other, you can use clothes pins to clip the tote bags to that rope and display the different styles you offer.
This type of display would be cute for a more casual style of bag or brand.
It won’t work for anything heavy, such as a leather tote, unless you use heavier rope and use more heavy-duty clothespins.
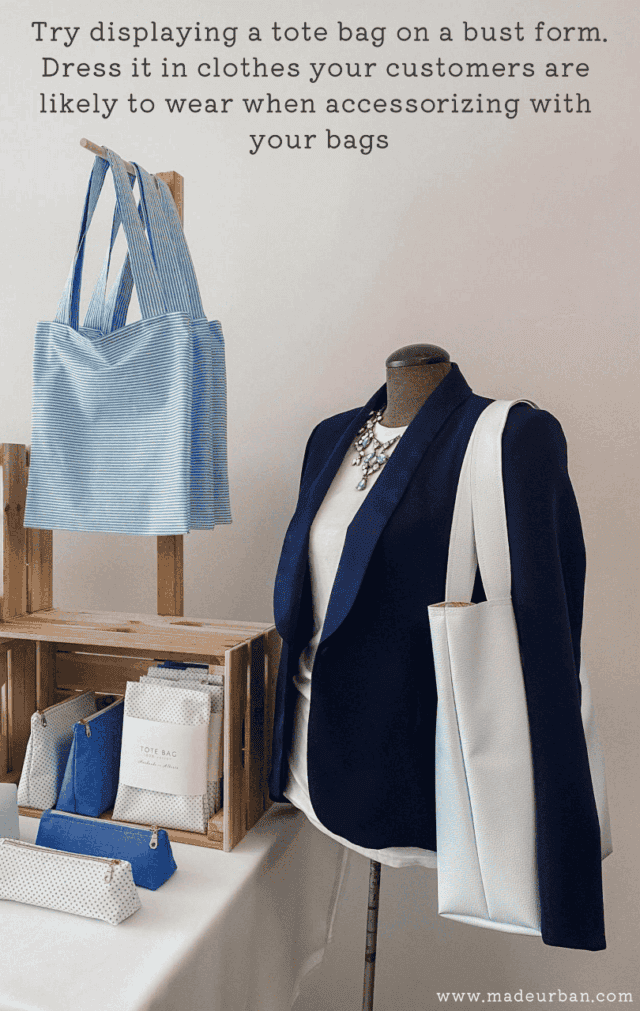
4) On a bust form
If you have a bust form, dress it in a top and place a tote bag on the shoulder (you may need to clip it in place so it doesn’t slide off).
It’s important to dress the form in a way your ideal customer would dress when wearing the style of bag you’re displaying.
For example, if you’re selling a winter line of tote bags that are going to be worn with winter jackets and heavy sweaters, don’t dress your bust form in a tank top. Dress it in a cozy sweater or a jacket.
Tip
I was able to acquire my bust form from the retailer I was working for when they were introducing a new style of bust form in their stores. They were going to toss the old ones so I asked to take one home. It’s a little worn and sun-bleached, but nothing some spray paint can’t fix.
You can find bust forms on Amazon or look for used ones on Kijiji or Facebook Marketplace. If you happen to come across a clothing retail store that’s closing, ask if they’re selling their bust forms. You may be able to get one for a good price.
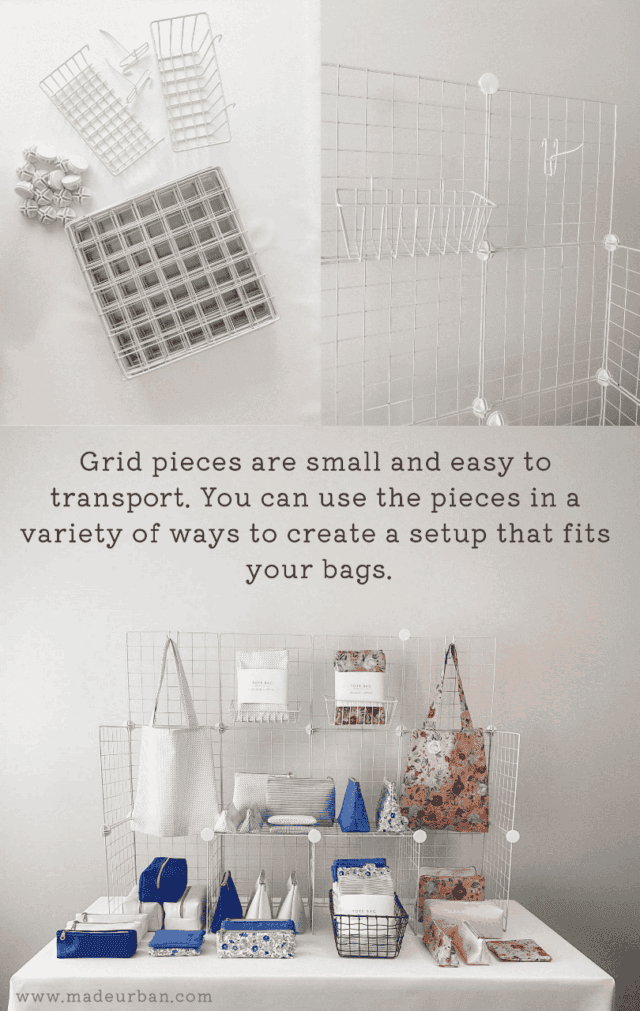
5) Grid shelving
This is my least favorite option, just because it doesn’t create a clean background for my products.
If you imagine the back of another vendor’s table being behind this grid fixture, there will be a lot of visual noise that can distract from my products.
As well, the gridlines create some visual clutter.
However, I could find a way to attach a piece of white foam core to the back of the unit, which would clean things up.
The pros of this type of display fixture are:
It’s lightweight and breaks down into a stack of 1’ x 1’ squares and the small attachment pieces, so it’s great for transporting.
- It offers flexibility for set up. You can create cubes, risers, or a unit similar to mine.
- It can be used for displaying tote bags and for stocking tote bags.
- It’s economical.
This is the one I purchased and then I added these hooks. I also have baskets that can hook on.
If you go this route, be sure to play around with different configurations to find what works best for the weight and style of your tote bags.
If you create a backdrop/wall with the grid pieces, and shoppers will be able to touch items displayed on that grid wall, make sure it’s nice and sturdy.
You may need to purchase 2 sets so you have enough pieces to make it stable.
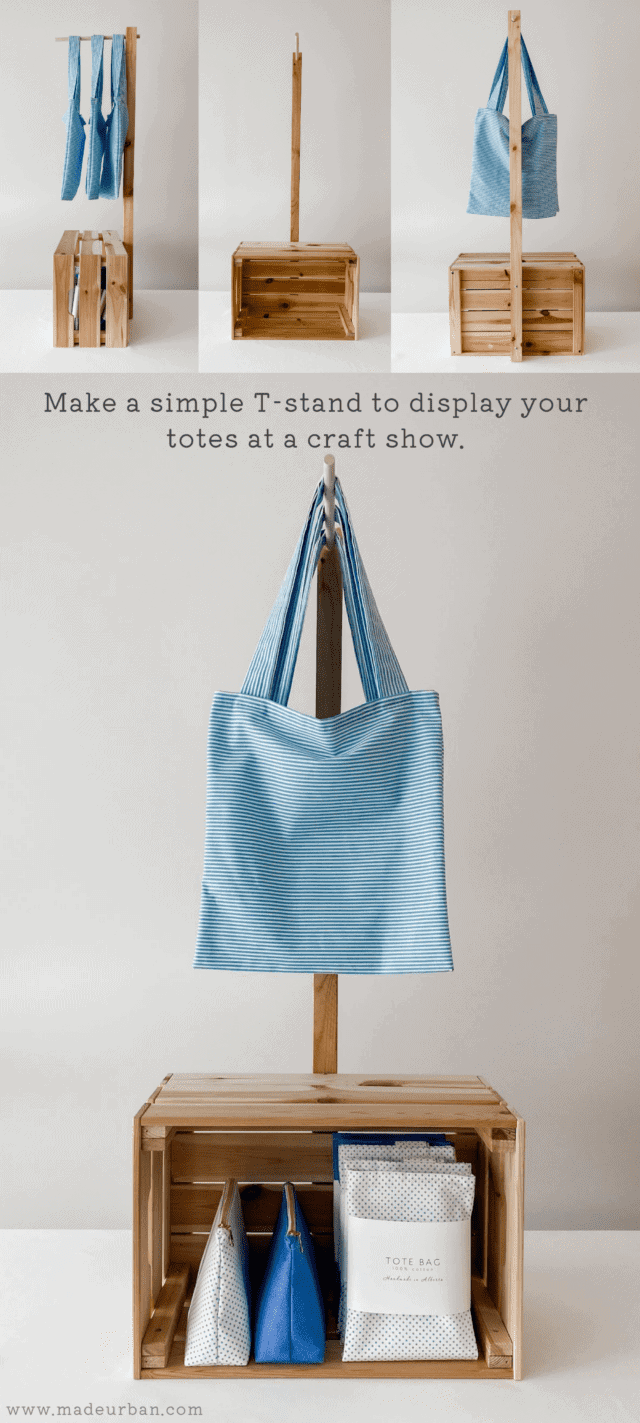
6) T-Stand
A T-Stand fixture will allow you to both display a bag (because it’s forward-facing), and house stock in it.
If you’re using this type of fixture, it’s important to only stock one or two styles of bags on each arm.
If you stock too many styles of bags on the T-stand, shoppers will have to remove the front bags to get to bags in the back, which makes it more difficult to shop.
You can purchase T-stands online (however they tend to be expensive because they’re used in retail stores, here’s an example of one), but it wouldn’t be hard to make one.
I drilled a hole in the top of a 2” x 2” piece of wood, big enough to fit a sturdy wooden dowel. Then I pre-drilled two holes at the bottom (so the screws wouldn’t crack the wood) and used two screws to secure the 2 x 2 to the back of my crate. I cut a wooden dowel to length and threaded it through the pre-drilled hole.
You could use a longer piece of 2 x 2 so it reaches the floor and then build a sturdy base for it.
A floor T-stand could sit next to your table and a dowel that extends out the front and back of the 2 x 2 gives you more room to house stock.
How to Stock Tote Bags at a Craft Show
“Stock” is product that is stacked, side-hung, folded, filed, shelved, etc. The shopper must sift through these items.
Here are ways to “stock” tote bags at a craft show.
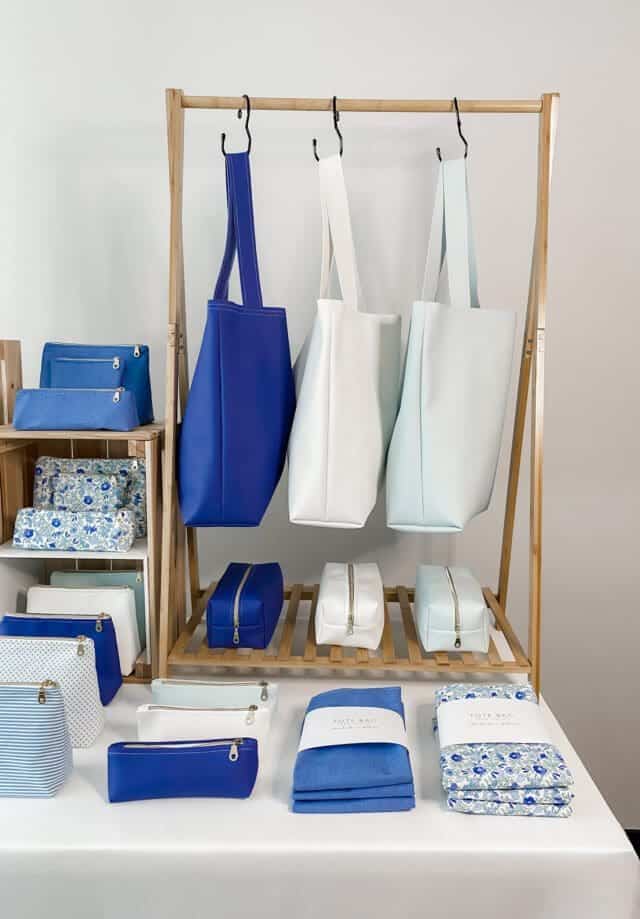
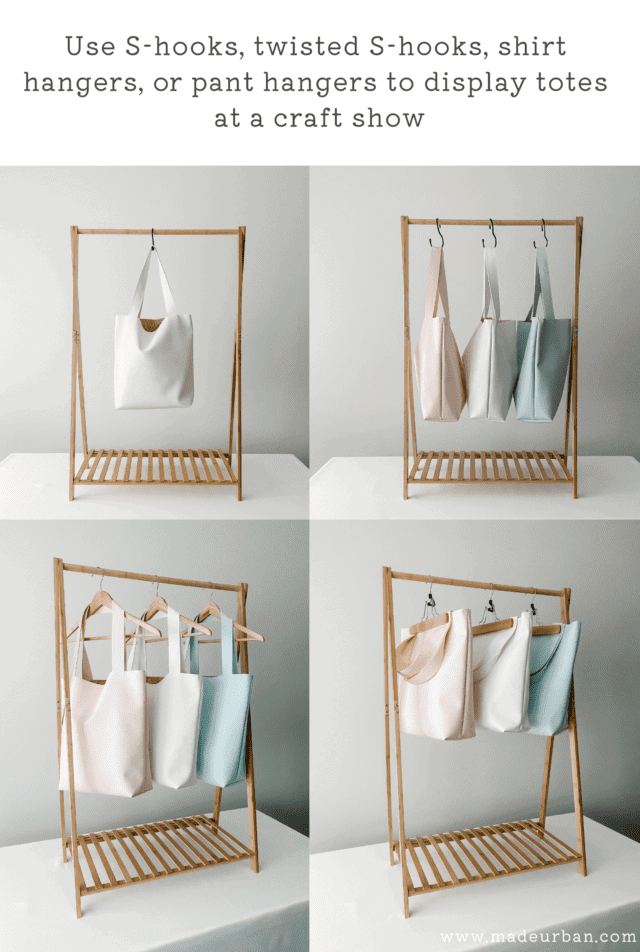
7) Hanging
You can hang tote bags by their handles, as long as it’s easy for shoppers to remove items. As mentioned, you don’t want shoppers to have to remove 10 bags to get to one to get to one hanging in the back.
If you’re hanging totes on a rollbar or hangbar, use accessories such as:
- Twisted S-hooks
- Pant hangers
- Shirt hangers
Again, there are many options for hanging your stock:
- Over the table rod
- Tabletop hanging fixture (i.e. kids’ clothes rack)
- DIY table rod
- Rollbar
- T-stand
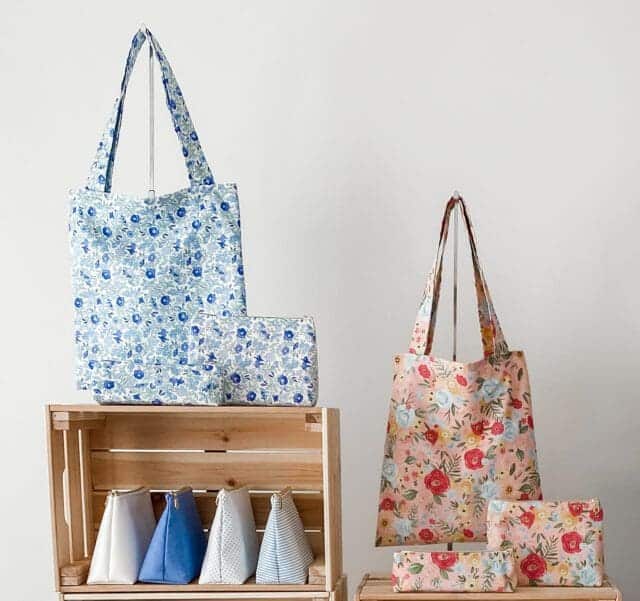
8) Folding Totes
Depending on the style of your tote bags, you may be able to fold or roll them, add packaging (e.g. a paper sleeve or twine to keep them tidy), and place them in a basket, box, or other display fixture.
This won’t work for leather tote bags or bulkier purses but may be an option if you’re selling totes made from lightweight fabric.
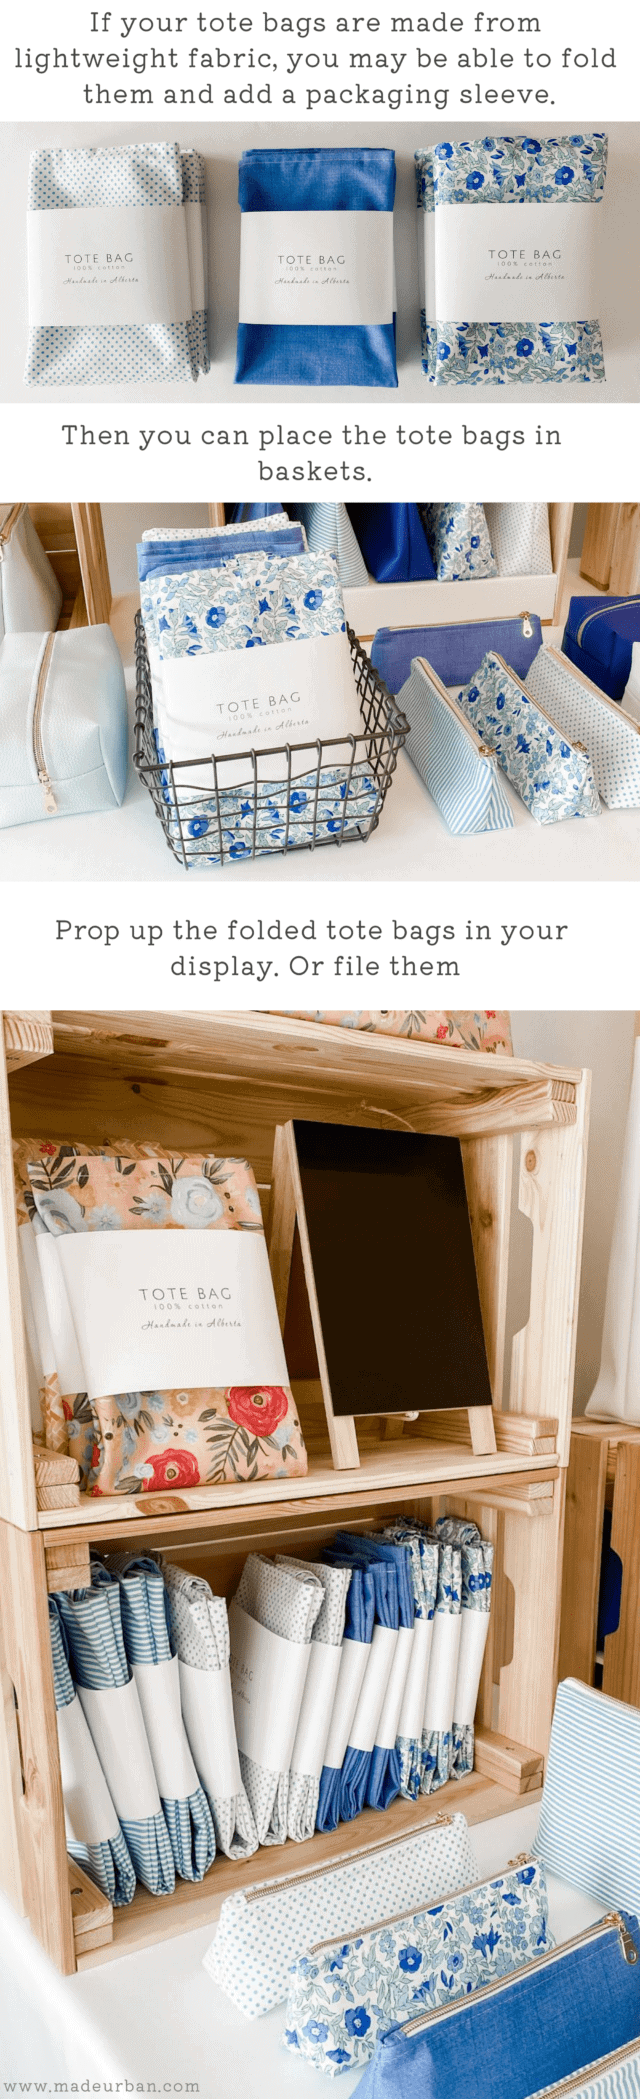
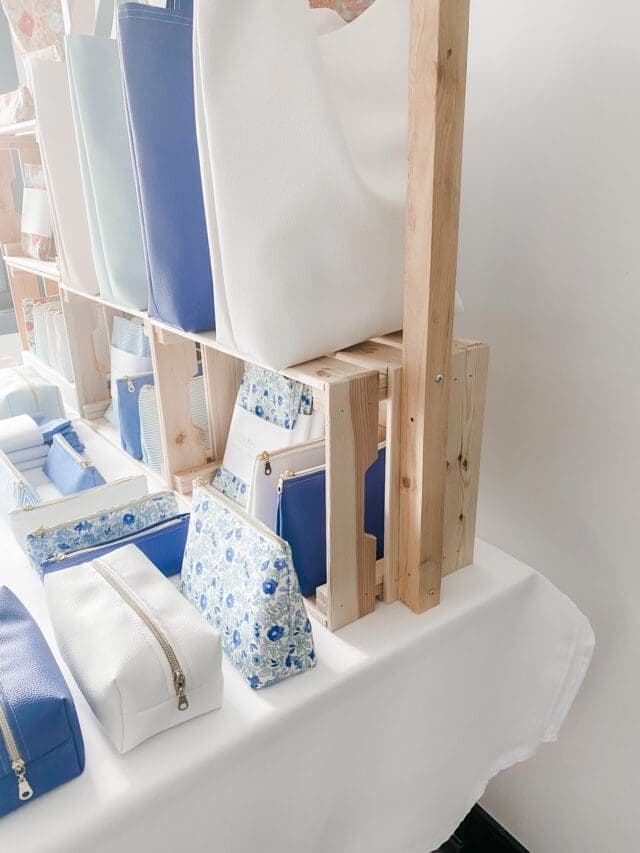
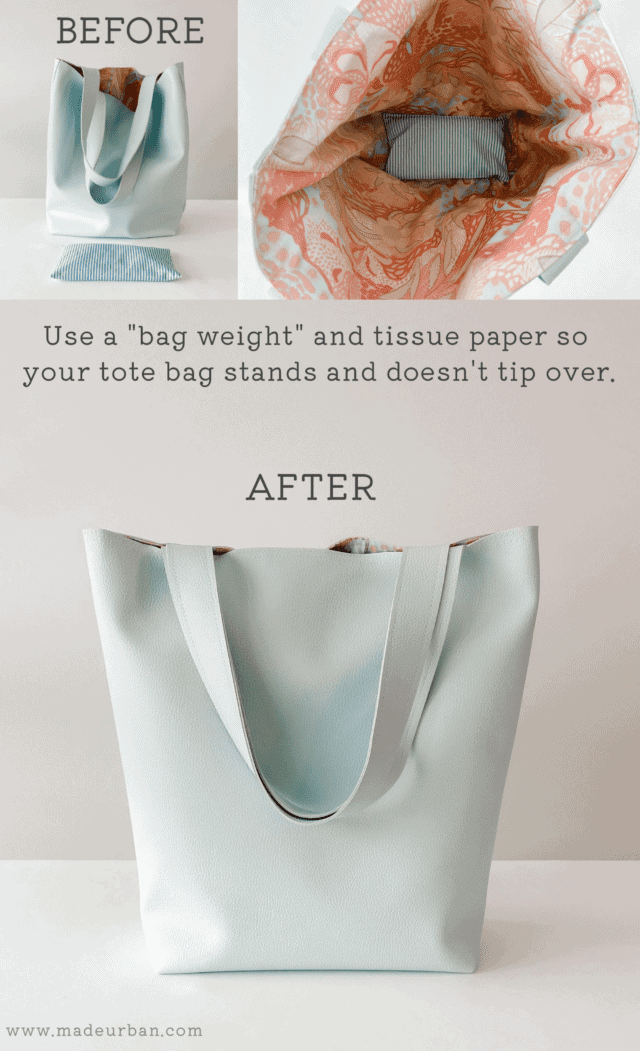
9) Standing/Filing Totes
If you’re selling flat-bottomed tote bags, you can use tissue paper to stuff the bags so they’ll sit on a flat surface.
If needed, you can make “bag weights” to ensure they don’t easily fall over.
I made this “bag weight” out of some scrap material and filled it with rice. I set it in the bottom of a flat-bottom tote bag and then added tissue paper to help fill out the bag.
When you sell a bag, just remember to remove the tissue paper and bag weight.
The bags will take up more room this way, but it may work if you offer limited styles/options.
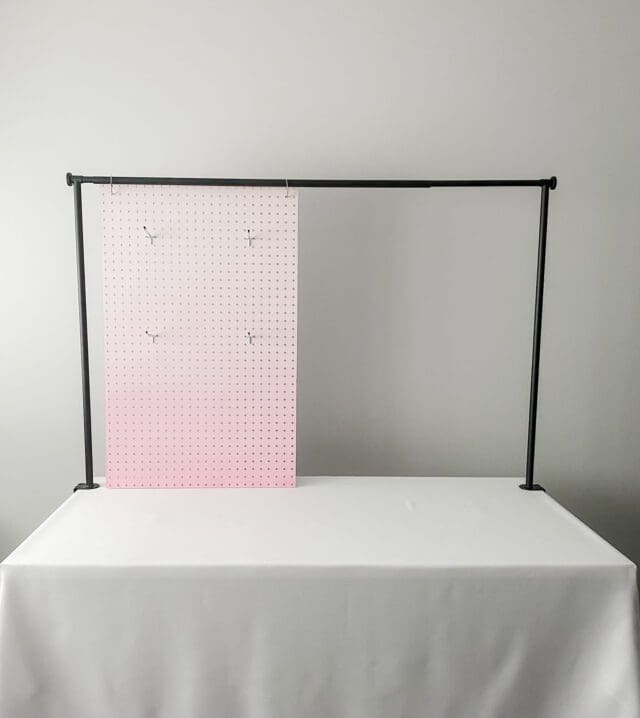
10) Pegboard
If you have a sturdy way to stand your pegboard on your table, or in your booth, pegs are another way to hang your stock.
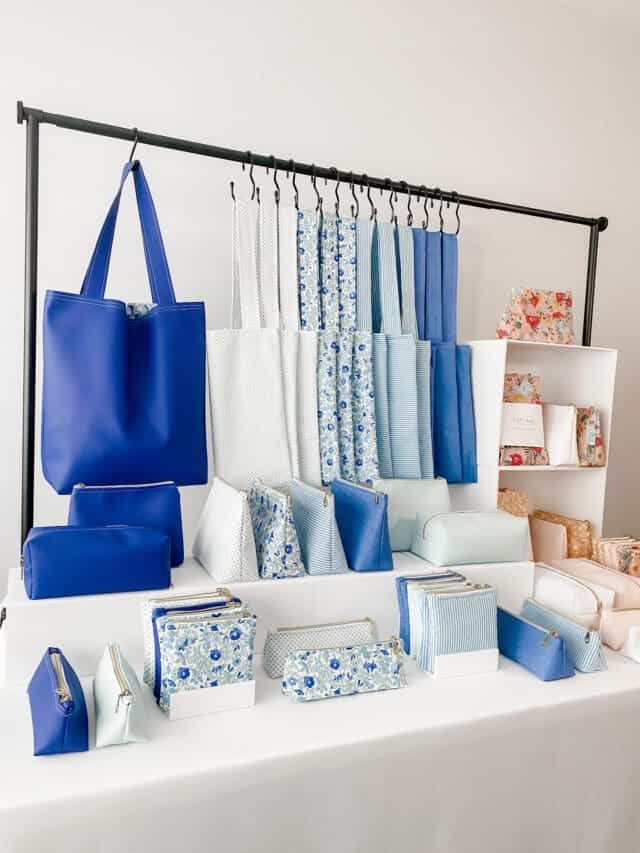
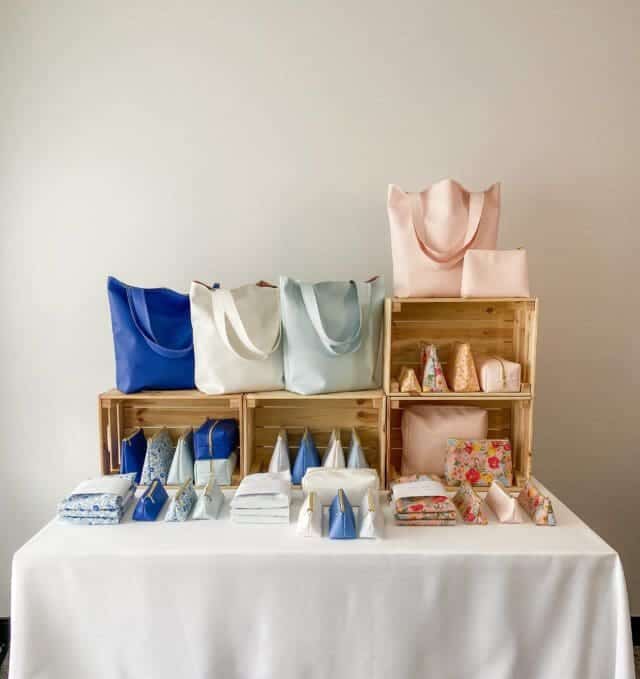
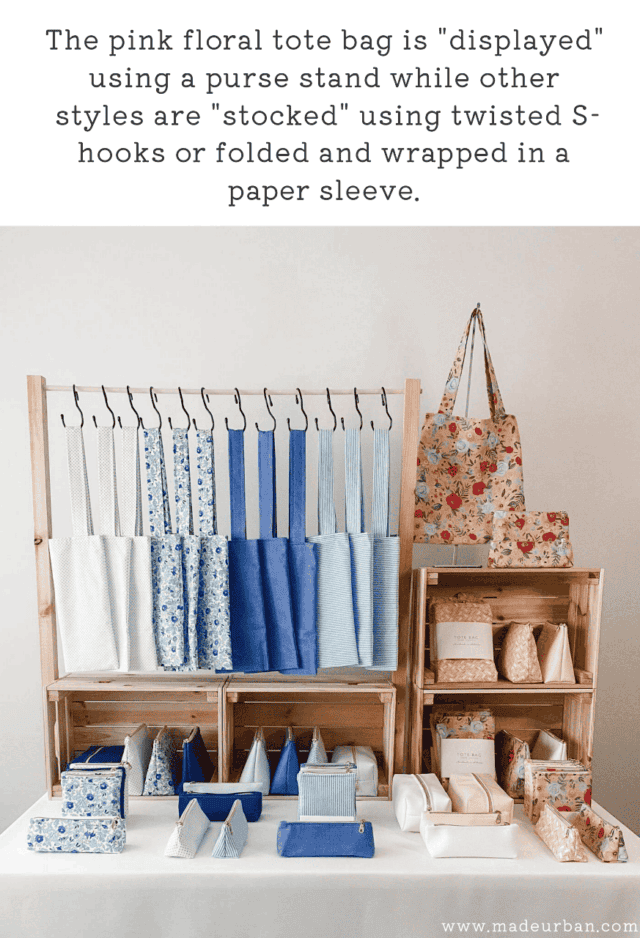
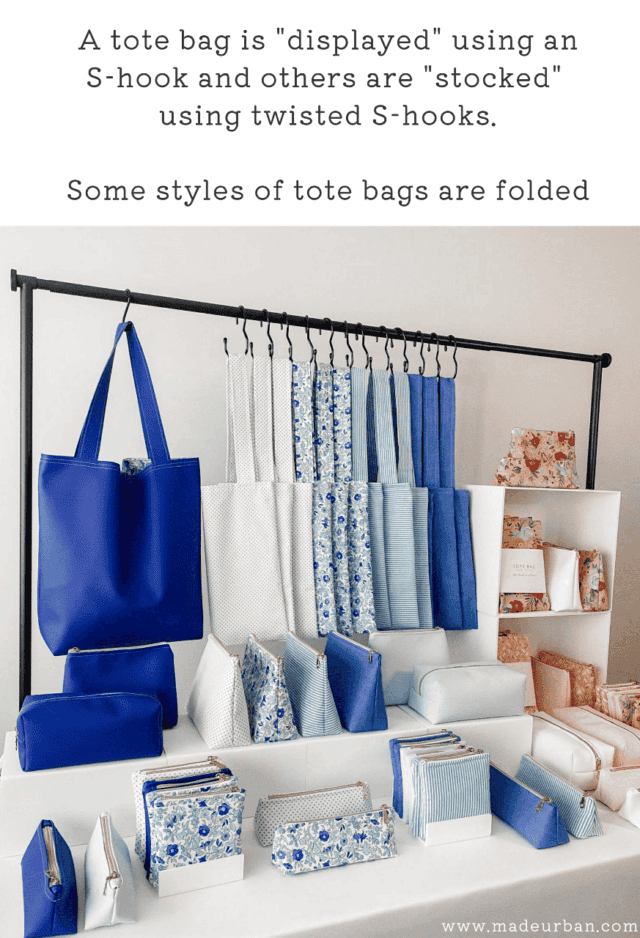
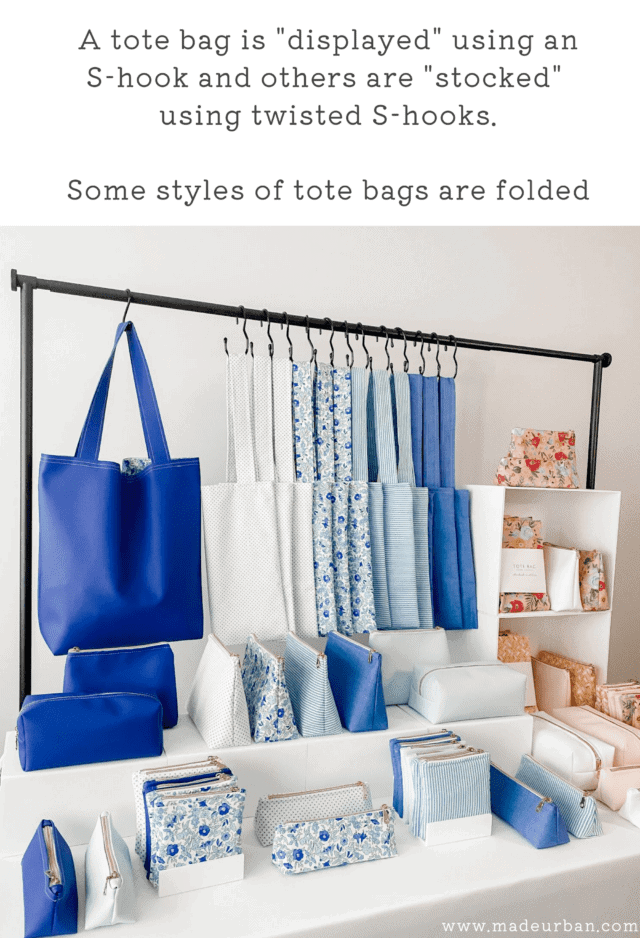
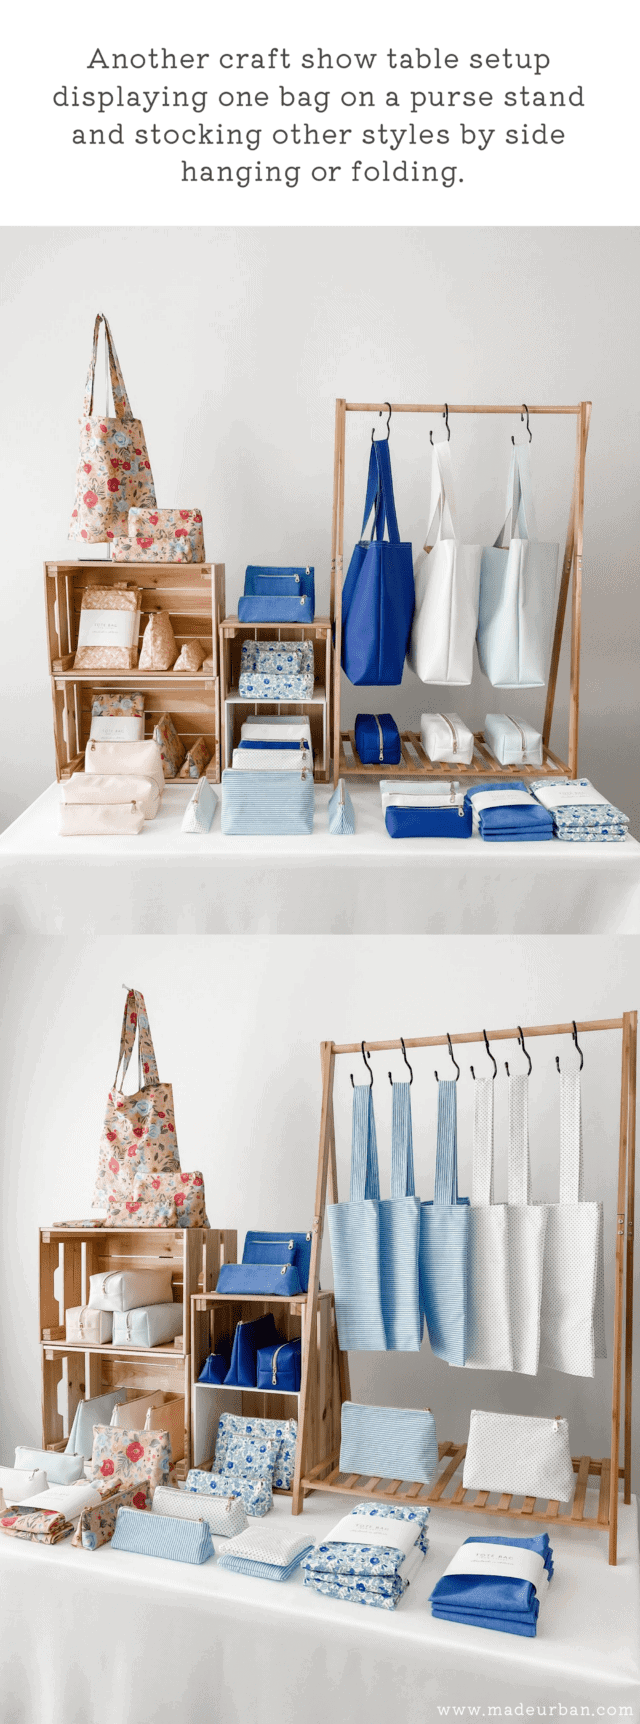
Mix & Match Display & Stock Elements
As mentioned, a mixture of displaying and stocking your tote bags is ideal. Here are a few examples of how I might combine display and stock elements on a craft show table.
Merchandising Tips
Here are few other merchandising tips to keep in mind.
Please remember, if you’re preparing for your first craft show, don’t stress about everything being perfect. Work with the stock, fixtures, and time you have, and do the best you can. With each event, you can make small improvements and eventually perfect your display.
Plan product collections
Your products are the foundation of your craft show display, so it’s important to consider how fabrics, colors, patterns, styles, etc. will look together in a small space and how you’ll display products, before making them.
When you keep your craft show display in mind when developing products, your display will come together much easier.
If you have a smaller space (like my 5’ table), stick to 1 – 3 collections that focus on 1 – 3 dominant colors.
For example, on my 5’ table, I feature 2 product collections (a blue collection and a pink collection). Blue and pink are the dominant colors, but there are touches of yellow, green, and orange.
You can learn more about developing product collections here: 5 Steps to Create a Product Collection that Sells
Make it shoppable
If shoppers must remove 3 bags to get to one, you’re making their job more difficult.
Choose fixtures that allow shoppers to access each product, without having to shuffle too many items around.
Limiting your options is also key in creating a shoppable tote bag display.
When you have 50 different color options, it’s difficult to make each color accessible.
It also makes it difficult for shoppers to make a purchasing decision.
Although loads of variation may attract more shoppers to your booth, studies have proven fewer people buy when presented with too much variation.
Make it sturdy
Be a shopper at your craft show table and test grabbing items and putting them back. If your products are easily knocked over or other products or fixtures block them, re-work your setup.
Also, test bumping your table and removing items from fixtures to ensure your fixtures and display are solid (I wouldn’t want the dowel to fall out of my T-stand when someone grabs a bag).
Group by color
To instantly make your display more visually pleasing, group your tote bags by color.
Here are 4 quick steps to follow when creating color stories for your craft show display: Craft Show Display 5-Minute Fix: Color Groupings
Add negative space
When you try to cram too many products into a craft show display, it gives more of a flea market vibe, which can lower the perceived value of your bags.
Limiting how much you display and giving each style of bag its space to shine will instantly make your bags seem more expensive.

Hey, I’m Erin 🙂 I write about small business and craft show techniques I’ve learned from being a small business owner for almost 2 decades, selling at dozens of craft shows, and earning a diploma in Visual Communication Design. I hope you find my advice helpful!
Hi Erin,
I really enjoy your books and newsletters. They are always so helpful! I’ve been doing craft shows for about 5 years now. I use Shopify for POS and online sales, Facebook and Instagram.
Lately I’ve wanted to scale back, not because I don’t enjoy designing and sewing bags, etc. but because the amount of time I spend not sewing or at craft shows is out of wack. Too much time is being spent on website work, taxes, maintaining accounts, advertising, posting, etc. It all needs to be easy. I want to drop my website for example, because I don’t want to maintain detailed information about products. I want it to be simple. Nobody buys from my website anyway.
I was wondering if you could write a piece about how to keep administrative work in balance. Simple banking, simple POS, simple website, all reasonably priced. I think it might be interesting to show how to step up as your business starts to grow; tools to add when you start to bring on extra help. I hope this makes sense. A system that requires the least amount of work. Anyway, thanks for listening.
Hi Wendy,
Thanks for commenting! And great to hear from you 🙂 My initial thought (and where I would start if I was feeling overwhelmed) is to look at your product line and see if you can scale that back at all.
I know the sewing and creating aren’t the source of your overwhelm, but when you cut back on how many skus you have, you also cut back on how many photos you must take for your website and social media, how many descriptions you must write, how often you must update your website, etc.
You can strategically plan product launches (e.g. spring collection), and then you only need to update your website perhaps 4 times a year (e.g. with each seasonal product collection launch), as opposed to updating multiple times a month or quarter when you make a new product. You can also “batch” your work, which will also free up time. For example, if you were to launch a spring collection, you’d photograph all your new products at once, as opposed to setting up and taking down your photography station to photograph one or two products.
I might suggest simplifying your website, rather than getting rid of it altogether (unless you have another online shop, e.g. Etsy shop). Consider having a few key pages (e.g. home, Bags, About pages) and only showcase your best sellers, rather than trying to keep up with listing every item you make.
Products are the foundation of a business so if you start there, you might find ways to free up some time.
I’ll keep your other questions in mind for a future article 🙂
~Erin
Hi Erin, I found this so useful and interesting, thank you so much for putting the information together. I’ve not long been selling at craft fairs and each time I make a tweak to my table display (and am convinced that I finally have the best set up), I discover another disadvantage on the day and have to think again. My product is handprinted fabric made into cushions, coasters, scarves, wash bags and greetings cards. Quite a lot to fit onto a 6’ table and it just ends up looking very busy and overwhelming, with everything competing for space. I also have quite a lot of different designs and colours which probably adds to the confusion. I have my scarves hanging from a rail fixed to the back of the table, similar to your example for the tote bags. I’ve tried hanging them different ways… first draped flat where the design was visible but the actual shape/style (infinity) wasn’t; second way on S hooks where the shape/style was more obvious but the design wasn’t! And the cushions… the design is appliquéd to the front only and trying to display those takes up a ton of space… I have them propped up leaning against a lower rail on my hanging rail. So, a long line of scarves with a long line of cushions below, then everything else placed on the table in front of the cushions. It’s early days and ‘best sellers’ haven’t really made themselves known to me yet so I’m trying to display everything I have! If you have any advice on how I could streamline this I’d be very grateful! Thank you so much.
Hi Bee,
Thank you so much! I’m so glad you found it helpful. I took a look at your Instagram page and your products are amazing! Your display is also looking great (and constantly tweaking is just part of the process 😉 You’re on the right track if you find something to improve with each event).
You do have a lot of variety but it still has a feeling of cohesion because you repeat colors/patterns from product to product. But as you discover what sells and what doesn’t, slowly start giving more space to your bestsellers, less space to items that don’t sell as well, and removing items that don’t sell at all.
Also look for purchasing patterns when it comes to your fabric prints. You may want to eventually niche down so you’re focusing on animals prints only, or botanicals only, or insects only.
You’ll know best, based on your customers and sales, but I believe you may want to eventually focus your efforts on one category of products (home goods (e.g. pillows, coasters, etc.) OR accessories (e.g. scarves & bags) OR stationery (e.g. cards)).
As for displaying your scarves and pillows, I have a couple of ideas…
I agree, the scarves are reading a little more as tea towels at first glance. I think making the scarf on the bust form more of a focal point (get it higher in your display, perhaps add two more to make a cluster of them) will help shoppers make more of a connection that those are infinity scarves. Then I would try to group your folded/hung scarves in more of a concentrated area, close to the bust forms wearing the scarves.
I wonder if it would work better to swap your wash bags and scarves in your display (hang the wash bags on the clothesline using the clothespins and then find a way to hang the scarves on the 4-prong t-stand (and keep that close to your bust form(s) wearing the scarf.
Alternatively, could you use some lightweight hangers and wrap the infinity scarf around the hanger (so it looks almost like the hanger is wearing the scarf).
For the pillows, I would consider only displaying 2 or 3 on your table. If the pillow covers are removable, you could remove the pillow forms (and keep them behind your table) and fold the pillow cases on your table (make sure you make it clear that the pillow cases do come with a pillow form).
I do have an article publishing soon about displaying vs stocking and finding a balance between the two. You may also find that helpful 🙂
~Erin
Hi Erin, there’s a lot of great advice here! I have another fair coming up next month and will definitely be putting these ideas into action… they make perfect sense. Thank you so much for taking the time to look at my products and give me some much needed advice, I really do appreciate it.
Bee
I’m glad it was helpful! Good luck at your next event 🙂
~Erin
Hi Erin, Thanks for this always helpful especially the visual examples and links.
I want to get into offering tote bags at shows but don’t want to stock them on the table or on the tent. I’d really appreciate a part 2 blog (with images and product suggestion links) about ways to display/stock bags on taller (adult height) racks like you would with clothes.
That would be amazing! Thanks in advance. Anitra
Hi Anitra,
Thanks for commenting and for your feedback! I’m glad you found the examples helpful. I’ll consider a part 2 for a future article.
My suggestion for now would be to use the ideas outlined in this article for hanging totes (using S-hooks, twisted S-hooks, shirt hangers or pant hangers) and simply purchase/make larger racks.
The rollbar example is regular height/adult size
The kids’ clothes rack comes in a regular adult size as well
The t-stand example explains that you can use floor versions of a T-stand (purchased or made).
I hope that helps!
Erin
Hi Erin,
Thank you for sharing all these helpful and great tips! It’ll be so helpful for our next event coming up, but I’m curious and trying to figure out how we can incorporate this for displaying our type of products. We sell stickers and tumblers with our own designs. Currently the stickers are all displayed forward facing in an easy to use pouch hung up sitting on the table. Would this be considered displayed or stock? Our tumblers are displayed on a 3-tiered shelf fitting 20 different designs. What would you change and recommend for a 6 foot table display?
Hi Meaghan,
Thanks for reading and commenting! The way you describe your sticker setup sounds like it’s both a display AND stock situation (like the totes displayed on the “t-stand”), which sounds great.
You could add more of a display element by creating a little vignette above or next to the sticker stand, showing a sticker or two in action.
I checked out your website (so amazing by the way!) and let’s say you have a collection of your strawberry stickers and most of your customers use their stickers on stationery. So to create a “vignette” you might add a stack of books (could wrap the books in red and white craft paper to go with the strawberry theme) and stand up a blank coiled notebook in front of the books (using the books to help prop up the notebook) and show a few of your strawberry stickers applied to the front of that notebook. Maybe add red and white pencil holder with red and white pens/pencils inside. You might even apply a strawberry sticker to the pencil holder.
This helps add a display element and gives shoppers a better idea of how they might use the stickers.
Your tumbler setup sounds great too. Again, you could create a second vignette for your tumblers (e.g. display one or two of your strawberry tumblers with a bowl of strawberries as props and/or a pitcher of water with fresh cut strawberries inside).
Or you may simply create one big vignette that displays a couple of your stickers in action, along with a tumbler or two.
I hope that helps but let me know if you have any other questions!
~Erin